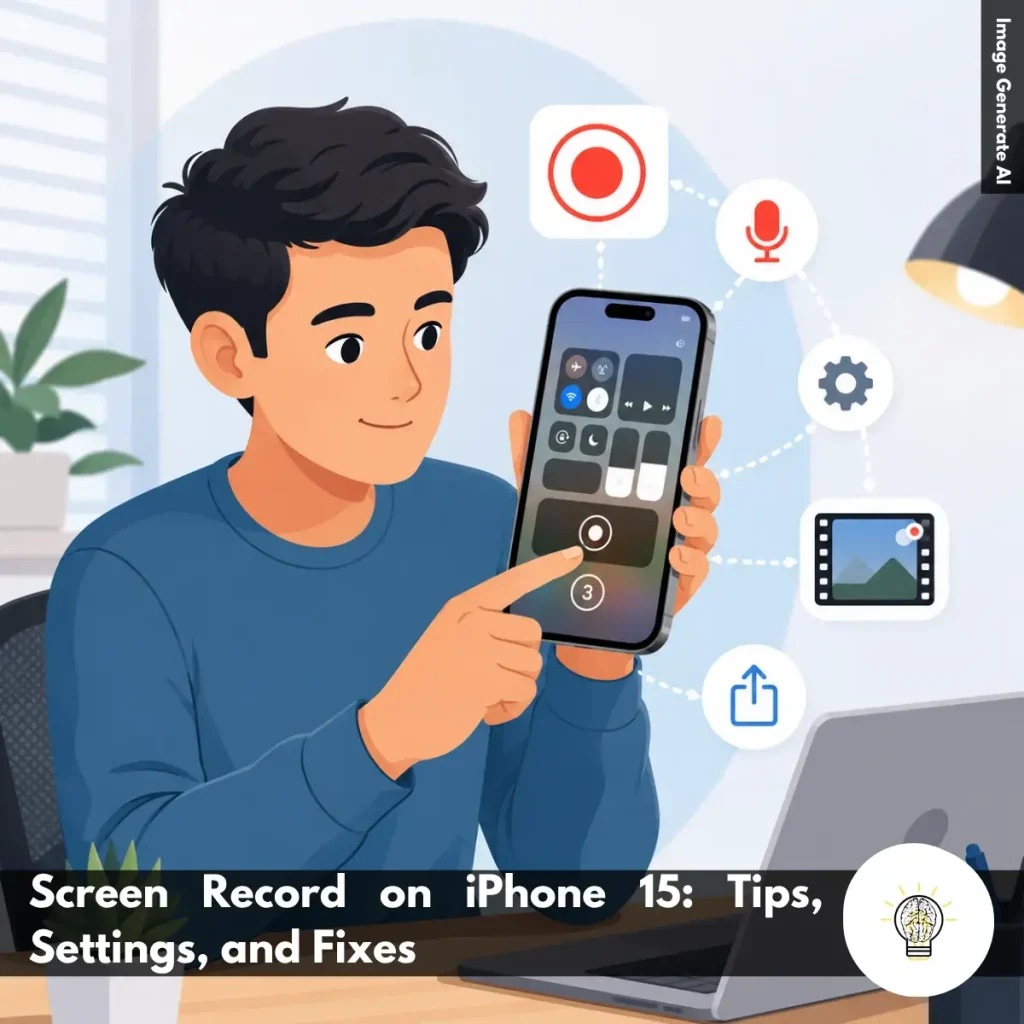
Ruminesia – Have you ever tried explaining something on your iPhone, only to realize that showing it would be much easier than describing it step by step? Whether you’re helping a friend troubleshoot an app, saving a memorable gameplay moment, or documenting something important, a screen recording is often far more practical than sending a long message. That’s where Screen Record on iPhone 15 becomes more useful than many people realize.
Interestingly, many iPhone 15 users already have this feature on their devices but rarely take full advantage of it. Sometimes the issue isn’t that the feature is difficult to use—it’s hidden in a place many people overlook, or a few small settings are easy to miss. As a result, simple tasks like creating a tutorial or saving evidence of an online transaction can feel more complicated than they need to be.
When you think about it, screen recording is about more than just capturing what appears on your display. It’s a practical way to save information, share experiences, and communicate more clearly in everyday situations. That’s why learning how to use it properly can make your iPhone 15 far more useful for both personal and professional needs.
Key Highlights
Screen recording makes explaining, documenting, and sharing information much easier.
Adding Screen Recording to Control Center saves time when capturing content.
Microphone audio helps create clearer tutorials, walkthroughs, and troubleshooting videos.
Do Not Disturb prevents notifications from interrupting or exposing private information.
Most recording issues stem from settings, storage limits, or temporary software glitches.
High-quality recordings require sufficient storage, battery life, and proper preparation.
Screen recording is a simple way to capture everything happening on your device’s screen—whether you’re using a smartphone, computer, or another device. This feature lets you save important moments, from app tutorials and online classes to work presentations, in a video format you can watch anytime.
It’s useful for both personal and professional needs. For example, if you’re an educator, you can record your teaching materials and share them with students more easily.
Why Record the Screen on iPhone 15?
Screen recording on the iPhone 15 offers various practical and productive benefits. Here are some reasons why you should consider using this feature:
Application Demonstrations: Helps effectively create tutorials for using applications.
Learning and Education: Facilitates the explanation of technical concepts in online learning.
Documentation: Serves as valid evidence in cases of online fraud.
Content Development: Assists in creating engaging social media content, including gameplay videos.
Business Use: Records presentations and product demonstrations for professional needs.
Personal Use: Captures essential moments in daily life, such as favourite gameplay.
How to Screen Record on iPhone 15
If you’re learning how to Screen Record on iPhone 15, the good news is that the process only takes a few minutes. Once everything is set up, you can quickly capture tutorials, gameplay, video calls, or anything happening on your screen whenever you need it.
Add Screen Recording to Control Center: Start by making sure the feature is easy to access. Open Settings > Control Center, then tap the green + button next to Screen Recording. This sounds simple, but many users overlook this step and wonder why the recording option isn’t available.
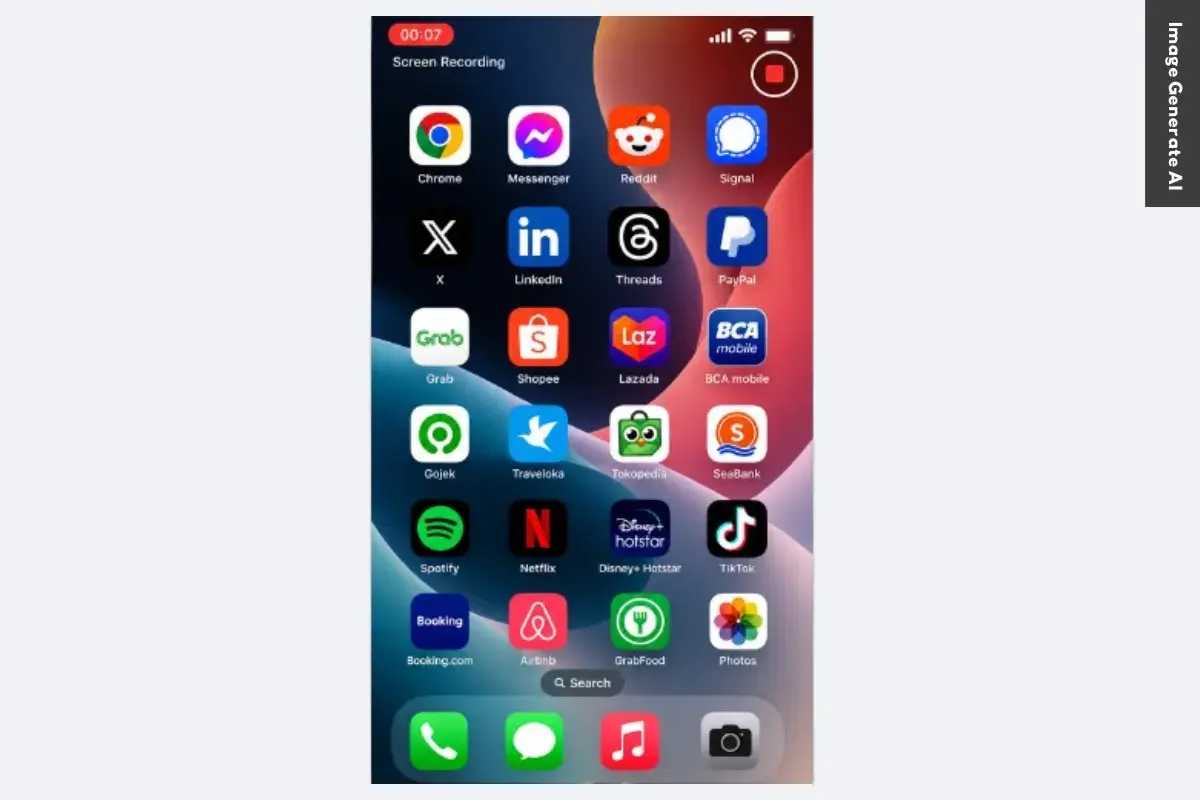
Start Recording in a Few Taps: Open Control Center by swiping down from the top-right corner of the screen, then tap the Screen Recording icon. A three-second countdown gives you enough time to return to the app or screen you want to capture. Once recording starts, everything on your display will be saved as a video.
Stop Recording When You’re Finished: When you’re done, tap the red recording indicator at the top of the screen or select Stop from the Dynamic Island. Your video will be processed automatically and saved to the Photos app. There’s no need to manually save or export the file.
Turn On Microphone Audio for Voiceovers: If you want to explain what you’re doing while recording, press and hold the Screen Recording icon before starting. Then tap Microphone to enable voice recording. This is especially useful for tutorials, app walkthroughs, or troubleshooting guides.
Find and Share Your Recordings Easily: All screen recordings are stored automatically in the Photos app under Screen Recordings. From there, you can trim unwanted sections, make quick edits, or share the video immediately. Besides that, keeping recordings in Photos makes them much easier to organize and find later.
Be Aware of App Restrictions: Some apps may prevent screen recording for privacy, security, or copyright reasons. If a video appears blank or certain content doesn’t show up, the limitation usually comes from the app itself rather than your iPhone. In practice, this is most common with streaming, banking, and other protected applications.
How to Use Quick Settings for Screen Recording on Your iPhone 15
If you’re looking for How to Use Quick Settings for Screen Recording on iPhone 15, Control Center offers the fastest solution. Once the Screen Recording shortcut is added, you can start capturing your screen in just a few taps without using any third-party apps.
Open Control Center Quickly: Swipe down from the top-right corner of your iPhone 15 to access Control Center. This is where all Quick Settings shortcuts, including Screen Recording, are located.
Access Control Customization: Tap the + button or open the customization menu. This allows you to add useful controls that aren’t displayed by default.
Find the Screen Recording Option: Scroll through the available controls until you see Screen Recording. The icon looks like a circle with a smaller dot inside, making it easy to recognize.
Add Screen Recording to Control Center: Tap the green + icon next to Screen Recording. Once added, you’ll be able to launch recordings directly from Quick Settings whenever you need them.
Organize the Shortcut for Faster Access: If possible, move the Screen Recording control closer to the top of the list. This sounds simple, but it can save time when you need to start recording quickly.
Start Recording with a Single Tap: Open Control Center and tap the Screen Recording icon. Your iPhone will display a short 3-second countdown before recording begins automatically.
Enable Microphone Audio When Needed: Press and hold the Screen Recording icon, then tap Microphone to turn it on. This is especially useful for tutorials, walkthroughs, or situations where you need to explain what’s happening on screen.
Return to the Content You Want to Capture: After starting the countdown, quickly switch back to the app, game, or screen you want to record. This helps ensure the recording captures everything from the beginning.
Stop the Recording Easily: Tap the red recording indicator at the top of the screen, then select Stop. You can also stop recording directly from Control Center.
Review and Edit Your Video: Open the Photos app to find the saved recording. If needed, use the built-in editing tools to trim unwanted sections before sharing.
Share Your Recording Instantly: Once you’re satisfied with the video, use the Share button in Photos to send it through messaging apps, email, or social media. In practice, this is one of the quickest ways to show someone exactly what’s happening on your device.
Troubleshoot if the Option Doesn’t appear: If the Screen Recording control is missing after setup, try restarting your iPhone or updating iOS. What many users forget is that minor software glitches can sometimes prevent newly added controls from appearing correctly.
Tips for Recording High-Quality Screen on iPhone 15
Looking for practical Tips for Recording High-Quality Screen on iPhone 15? A few simple adjustments before you start recording can make a big difference in video clarity, audio quality, and overall presentation, helping you create cleaner and more professional-looking screen recordings with minimal effort.
Record in Landscape Mode: Turn your iPhone sideways before recording for a wider and more comfortable viewing experience. This works especially well for tutorials, gameplay, and app demonstrations, while also reducing black bars on larger screens.
Choose the Best Recording Quality: Use the highest available recording quality to keep text, icons, and interface details sharp. This sounds simple, but many people overlook it until they notice blurry elements in the final video.
Use an External Microphone: If you’re recording voice narration, try using an external microphone. It helps reduce background noise and makes your instructions clearer and easier to follow.
Free Up Storage Space First: Check your available storage before you start recording. High-quality videos can take up a lot of space, and running low on storage may interrupt or prevent recordings from being saved properly.
Keep Your Battery Charged: Make sure your iPhone has enough battery before recording, especially for longer sessions. If possible, keep it connected to a charger to avoid unexpected interruptions.
Enable Do Not Disturb: Turn on Do Not Disturb or a Focus mode to block notifications, calls, and alerts. This keeps your recording distraction-free and prevents personal information from appearing on screen.
Trim and Clean Up Your Video: After recording, use the Photos app to remove mistakes, pauses, or unnecessary sections. A few quick edits can make your video feel much more polished without requiring advanced editing tools.
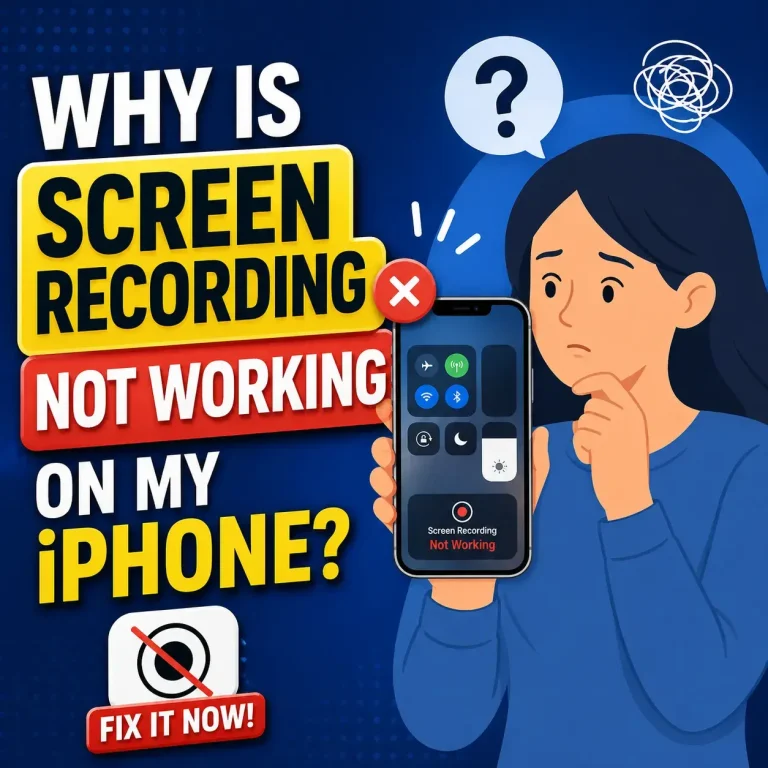
Troubleshooting Screen Recording Issues on iPhone 15
Here’s a practical checklist to help with Troubleshooting Screen Recording Issues on iPhone 15. Most recording problems are caused by settings, storage limitations, or temporary software glitches, so these quick fixes are often enough to get things working again.
Turn On the Microphone: If your screen recordings have no sound, check whether the microphone is enabled. Open Control Center, press and hold the Screen Recording button, and make sure the Microphone option is turned on. This sounds simple, but many users overlook it and end up with silent recordings.
Check Screen Time Restrictions: Screen Time settings can block screen recording without showing an obvious error message. Go to Settings > Screen Time > Content & Privacy Restrictions and confirm that Screen Recording is allowed. This is especially important on work, school, or family-managed devices.
Restart Your iPhone: A quick restart can clear temporary bugs that interfere with screen recording. Turn your iPhone off, wait about 30 seconds, and turn it back on. In practice, this often resolves random recording failures that appear after long periods of device use.
Free Up Storage Space: Screen recordings require available storage to save properly. Head to Settings > General > iPhone Storage and make sure you have several gigabytes of free space. If storage is nearly full, recordings may stop unexpectedly or fail to save altogether.
Disable Low Power Mode: Low Power Mode helps conserve battery, but it can sometimes limit background processes needed for stable recording. Go to Settings > Battery and temporarily turn it off. If possible, test screen recording again with normal power settings enabled.
Install the Latest iOS Update: Apple regularly fixes bugs through iOS updates, including issues that affect screen recording. Open Settings > General > Software Update and install any available updates. What many users forget is that software bugs are often resolved without any additional troubleshooting.
Reset All Settings: If nothing else works, try resetting your settings. Go to Settings > General > Transfer or Reset iPhone > Reset > Reset All Settings. Your personal data stays intact, but system settings return to their defaults, which can help eliminate hidden configuration conflicts.
Restart the App You’re Recording: Sometimes the problem is specific to one app rather than iOS itself. Close the app completely, reopen it, and start a new recording session. If screen recording works in other apps, there’s a good chance the app was causing the issue.
Frequently Asked Questions About Screen Recording on the iPhone
Looking for quick answers about screen recording on iPhone? Here are the most common questions users ask, along with practical solutions you can use right away.
1. How do I enable screen recording on my iPhone?
To enable Screen Recording, open Settings > Control Center and tap the green + icon next to Screen Recording.
Once added, the feature will appear in Control Center and remain there unless you remove it manually. This only takes a few seconds and gives you quick access whenever you need to screen record on iPhone.
2. How do I start a screen recording on an iPhone?
Starting a recording is simple:
Open Control Center by swiping down from the top-right corner.
Tap the Screen Recording icon.
Wait for the 3-second countdown.
Use your iPhone normally while recording.
A red indicator at the top of the screen confirms that recording is active.
3. How do I screen record on an iPhone with internal audio?
In most cases, iPhone automatically captures internal audio from supported apps and games. To improve results:
Make sure your volume is turned up.
Disable Silent Mode if necessary.
Use apps that allow audio recording.
Keep in mind that some apps restrict audio capture for copyright or privacy reasons.
4. How do I record my voice while screen recording on an iPhone?
To include your voice during recording:
Open Control Center.
Press and hold the Screen Recording button.
Tap the microphone to turn it on.
Select Start Recording.
This is useful for tutorials, walkthroughs, and narrated demonstrations.
5. Where are screen recordings saved on the iPhone?
All screen recordings are automatically saved in the Photos app. To find them:
Open Photos.
Tap Albums.
Scroll to Screen Recordings under Media Types.
You can edit, share, or delete recordings directly from there.
6. Why is my iPhone screen recording not saving to Photos?
The most common cause is insufficient storage space. Other possible reasons include:
A temporary iOS glitch.
Recording content from restricted apps.
Interrupted recording sessions.
Try freeing up storage and restarting your iPhone before recording again.
7. How do I stop a screen recording on my iPhone?
You can stop recording in two ways:
Tap the red status indicator or Dynamic Island.
Open Control Center and tap the red Screen Recording icon.
After stopping, the video is automatically saved to Photos.
8. How do I trim or edit a screen recording on an iPhone?
You can edit recordings directly in the Photos app.
Open the recording.
Tap Edit.
Drag the timeline handles to trim unwanted sections.
Tap Done and save your changes.
You can also crop, rotate, and apply basic adjustments without installing another app.
9. Why is there no sound on my iPhone screen recording?
Missing audio is usually caused by recording settings. Check the following:
Enable the microphone if you want voice narration.
Increase your device volume.
Turn off Silent Mode when recording app sounds.
Verify the app allows audio capture.
One thing many users overlook is that microphone audio and internal audio are controlled separately.
10. Can I screen record a FaceTime call with audio on my iPhone?
No, iPhone does not allow FaceTime call audio to be captured through Screen Recording.
While you can record the screen itself, the audio portion is typically blocked for privacy and legal reasons. This restriction helps protect participants and comply with recording consent laws in many regions.
Conclusion
Screen recording is one of those features that seems simple at first, but becomes surprisingly useful once it becomes part of your routine. Whether you’re creating a quick tutorial, saving important information, or helping someone solve a problem, knowing how to Screen Record on iPhone 15 can save time and make communication much easier.
Interestingly, the real value isn’t just in capturing what’s happening on your screen. It’s in making information easier to share, preserving moments that matter, and avoiding the frustration of trying to explain something with words alone. Sometimes, a short recording can do what several messages cannot.
As technology becomes more integrated into everyday life, small features like screen recording often end up being the most practical ones. Have you found yourself using screen recording for something unexpected? It’s always interesting to see how different people turn the same feature into a solution for completely different needs.
A technology writer with 5 years of professional experience as a WordPress Developer and SEO Specialist. Focused on covering apps, gadgets, and the latest digital trends, while creating SEO-friendly content that helps readers stay informed and businesses grow their online presence.