Ruminesia – Ever had your iPhone act up when you needed it most? A screen glitch, camera issue, or message that won’t send can be frustrating, especially when the cause isn’t obvious.
The good news is that many of these problems have simple fixes. When it comes to Troubleshooting Common Issues on iPhone, a quick setting adjustment or restart is often enough to solve the issue.
Interestingly, not every iPhone problem points to a serious hardware failure. Knowing a few practical troubleshooting steps can save time and help keep your device running smoothly.
Key Highlights
Many common iPhone issues can be fixed without professional repair.
A simple restart often resolves temporary software-related problems.
Keeping iOS updated helps prevent bugs and improves device performance.
Checking settings first can save time when troubleshooting camera or messaging issues.
Physical damage and water exposure are common causes of persistent hardware problems.
Knowing basic troubleshooting steps can help you avoid unnecessary repair costs.
iPhones are generally reliable, but occasional problems can still happen. Whether you’re dealing with display glitches, camera issues, or messaging problems, this guide to troubleshooting common Issues on iPhone covers practical fixes you can try before seeking professional help.
1. Troubleshooting the Line on the iPhone Screen
Seeing lines on your screen doesn’t always mean the display needs immediate replacement. This Troubleshooting the Line on the iPhone Screen guide covers simple checks and fixes that can help you identify the cause before seeking professional repair.
Restart Your iPhone: Start with a simple restart to clear temporary system glitches. This is often the quickest way to rule out minor software issues.
Perform a Hard Reset: If the lines remain, try a hard reset based on your iPhone model. This can help resolve deeper system errors without deleting your data.
Update iOS: Make sure your iPhone is running the latest version of iOS. Software updates often include bug fixes that can resolve display-related problems.
Check for Water Damage: Inspect the charging port, speaker openings, and Liquid Damage Indicator for signs of moisture. Water exposure can affect the display and internal components.
Inspect for Physical Damage: Look for cracks, dents, or signs of a recent drop. Even minor impact damage can cause screen lines or display issues.
Remove the Screen Protector: A damaged or poorly fitted screen protector can sometimes create visual distortions. Remove it and check whether the lines are still visible.
Test the Affected Area: Gently press the area where the lines appear and observe any changes. If the lines shift or disappear temporarily, a loose connection may be involved.
Restore Your iPhone: Back up your data and perform a full restore if you suspect a software issue. This can eliminate system conflicts that may be affecting the display.
Seek Professional Repair: If none of these troubleshooting steps work, the problem is likely hardware-related. Visit an Apple Store or authorized repair center for a proper diagnosis.
2. Troubleshooting Night Mode Issues on iPhone
Night Mode usually works automatically, but occasional issues can affect photo quality. If you’re troubleshooting night mode issues on iPhone, these quick fixes can help improve low-light photography results.
Check if Night Mode Is Enabled: Open the Camera app and look for the moon icon. If it’s turned off, tap it to activate Night Mode manually.
Restart Your iPhone: A quick restart can fix temporary camera glitches that may prevent Night Mode from working properly.
Adjust the Exposure Time: Tap the Night Mode icon and use the slider to increase or decrease exposure based on your lighting conditions.
Keep Your iPhone Steady: Hold your phone firmly or use a stable surface to reduce blur during longer exposures.
Turn Off Live Photos and Flash: These features can affect how Night Mode processes low-light scenes and may limit its effectiveness.
Update to the Latest iOS Version: Install available updates to benefit from the latest camera improvements and bug fixes.
Reset All Settings as a Last Resort: If nothing works, reset your settings to eliminate potential system conflicts without deleting personal data.
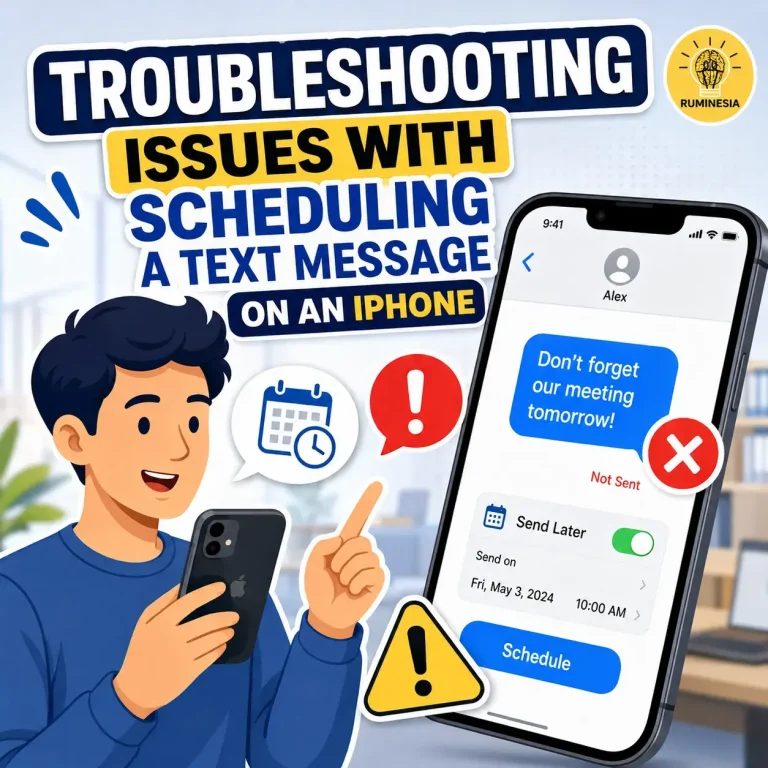
3. Troubleshooting Issues with Scheduling a Text Message on an iPhone
If a scheduled text message doesn’t send on time, the problem is usually linked to a simple setting, connectivity issue, or software requirement. What many users don’t realize is that even small configuration errors can affect how the feature works. This guide to troubleshooting issues with scheduling a Text Message on an iPhone will walk you through the most common causes and practical solutions.
Check Your Internet Connection: iMessage requires Wi-Fi or mobile data to schedule and send messages. If it isn’t working, reconnect to the internet or restart your iPhone.
Verify the Scheduled Time: Make sure you selected the correct date and time before confirming. Even a small mistake can cause you to miss the intended send time.
Update to the Latest iOS Version: The Send Later feature is available on iOS 18 or later. If you don’t see the option, check for available software updates.
Confirm the Recipient Uses iMessage: Scheduled sending only works in iMessage conversations with blue message bubbles. It won’t be available for SMS chats with green bubbles.
Keep Your iPhone Powered On: Your device needs to stay on until the scheduled message is sent. Charge your iPhone if the battery is running low.
Enable Automatic Date and Time: Incorrect time settings can interfere with scheduled messages. Go to Date & Time settings and turn on Set Automatically.
Turn On Messages in iCloud: Enabling Messages in iCloud keeps scheduled texts synced across your Apple devices. This can also help prevent missing or inconsistent schedules.
Frequently Asked Questions About Screen Recording on the iPhone
Looking for quick answers about screen recording on iPhone? Here are the most common questions users ask, along with practical solutions you can use right away.
1. How do I enable screen recording on my iPhone?
To enable Screen Recording, open Settings > Control Center and tap the green + icon next to Screen Recording.
Once added, the feature will appear in Control Center and remain there unless you remove it manually. This only takes a few seconds and gives you quick access whenever you need to screen record on iPhone.
2. How do I start a screen recording on an iPhone?
Starting a recording is simple:
Open Control Center by swiping down from the top-right corner.
Tap the Screen Recording icon.
Wait for the 3-second countdown.
Use your iPhone normally while recording.
A red indicator at the top of the screen confirms that recording is active.
3. How do I screen record on an iPhone with internal audio?
In most cases, iPhone automatically captures internal audio from supported apps and games. To improve results:
Make sure your volume is turned up.
Disable Silent Mode if necessary.
Use apps that allow audio recording.
Keep in mind that some apps restrict audio capture for copyright or privacy reasons.
4. How do I record my voice while screen recording on an iPhone?
To include your voice during recording:
Open Control Center.
Press and hold the Screen Recording button.
Tap the microphone to turn it on.
Select Start Recording.
This is useful for tutorials, walkthroughs, and narrated demonstrations.
5. Where are screen recordings saved on the iPhone?
All screen recordings are automatically saved in the Photos app. To find them:
Open Photos.
Tap Albums.
Scroll to Screen Recordings under Media Types.
You can edit, share, or delete recordings directly from there.
6. Why is my iPhone screen recording not saving to Photos?
The most common cause is insufficient storage space. Other possible reasons include:
A temporary iOS glitch.
Recording content from restricted apps.
Interrupted recording sessions.
Try freeing up storage and restarting your iPhone before recording again.
7. How do I stop a screen recording on my iPhone?
You can stop recording in two ways:
Tap the red status indicator or Dynamic Island.
Open Control Center and tap the red Screen Recording icon.
After stopping, the video is automatically saved to Photos.
8. How do I trim or edit a screen recording on an iPhone?
You can edit recordings directly in the Photos app.
Open the recording.
Tap Edit.
Drag the timeline handles to trim unwanted sections.
Tap Done and save your changes.
You can also crop, rotate, and apply basic adjustments without installing another app.
9. Why is there no sound on my iPhone screen recording?
Missing audio is usually caused by recording settings. Check the following:
Enable the microphone if you want voice narration.
Increase your device volume.
Turn off Silent Mode when recording app sounds.
Verify the app allows audio capture.
One thing many users overlook is that microphone audio and internal audio are controlled separately.
10. Can I screen record a FaceTime call with audio on my iPhone?
No, iPhone does not allow FaceTime call audio to be captured through Screen Recording.
While you can record the screen itself, the audio portion is typically blocked for privacy and legal reasons. This restriction helps protect participants and comply with recording consent laws in many regions.
Conclusion
iPhone problems often seem bigger than they really are. A display issue, camera glitch, or messaging error can be frustrating, but many of these situations can be resolved with a few simple checks before considering a repair.
What makes troubleshooting common issues on iPhone so useful is that it helps you separate temporary software hiccups from genuine hardware problems. In many cases, understanding the cause is just as important as finding the fix, saving both time and unnecessary expense.
Interestingly, the most effective solution is often the simplest one. Have you run into any of these iPhone issues before, or discovered a troubleshooting tip that worked better than expected? Share your experience and join the conversation.
A technology writer with 5 years of professional experience as a WordPress Developer and SEO Specialist. Focused on covering apps, gadgets, and the latest digital trends, while creating SEO-friendly content that helps readers stay informed and businesses grow their online presence.