ruminesia – If you’ve ever tried to save a quick tutorial, capture a funny moment in an app, or record something you can’t easily download, you’ve probably wondered how to screen record on iPhone 15 without digging through menus. It’s one of those features you know exists, but it always seems hidden when you actually need it.
Many users run into the same hassle—swiping around the screen, opening Settings, or searching for the right button at the moment they want to capture slips away. The good news is that the iPhone 15 makes screen recording simple once you know exactly where everything is.
Whether you need it for school, work, or just to save something important, screen recording can instantly make your phone more useful. Once you set it up properly, starting a recording becomes as easy as a single tap.
Key Highlights:
Screen recording is built into iPhone 15 and accessible through Control Center.
You can add the Screen Recording button quickly via Settings > Control Center.
Starting a recording only requires opening Control Center and tapping the icon.
Microphone audio can be enabled by long-pressing the recording button.
All recordings are saved automatically in the Photos app for easy editing and sharing.
Screen recording is a simple way to capture everything happening on your device’s screen—whether you’re using a smartphone, computer, or another device. This feature lets you save important moments, from app tutorials and online classes to work presentations, in a video format you can watch anytime.
It’s useful for both personal and professional needs. For example, if you’re an educator, you can record your teaching materials and share them with students more easily.
Why Record the Screen on iPhone 15?
Screen recording on the iPhone 15 offers various practical and productive benefits. Here are some reasons why you should consider using this feature:
Application Demonstrations: Helps effectively create tutorials for using applications.
Learning and Education: Facilitates the explanation of technical concepts in online learning.
Documentation: Serves as valid evidence in cases of online fraud.
Content Development: Assists in creating engaging social media content, including gameplay videos.
Business Use: Records presentations and product demonstrations for professional needs.
Personal Use: Captures essential moments in daily life, such as favourite gameplay.
How to Screen Record on iPhone 15
Screen recording on the iPhone 15 is available directly through the Control Center and works on iOS 17 or later. This built-in tool lets you capture your screen as a video, with the option to include microphone audio.
1. Set Up Screen Recording
Make sure the Screen Recording button is added to Control Center.
Open Settings > Control Center.
Tap the green + next to Screen Recording to enable it.
2. Start Recording
Begin capturing your screen in a few taps.
Swipe down from the top-right corner to open Control Center.
Tap the Screen Recording icon (circle within a circle). A 3-second countdown will appear.
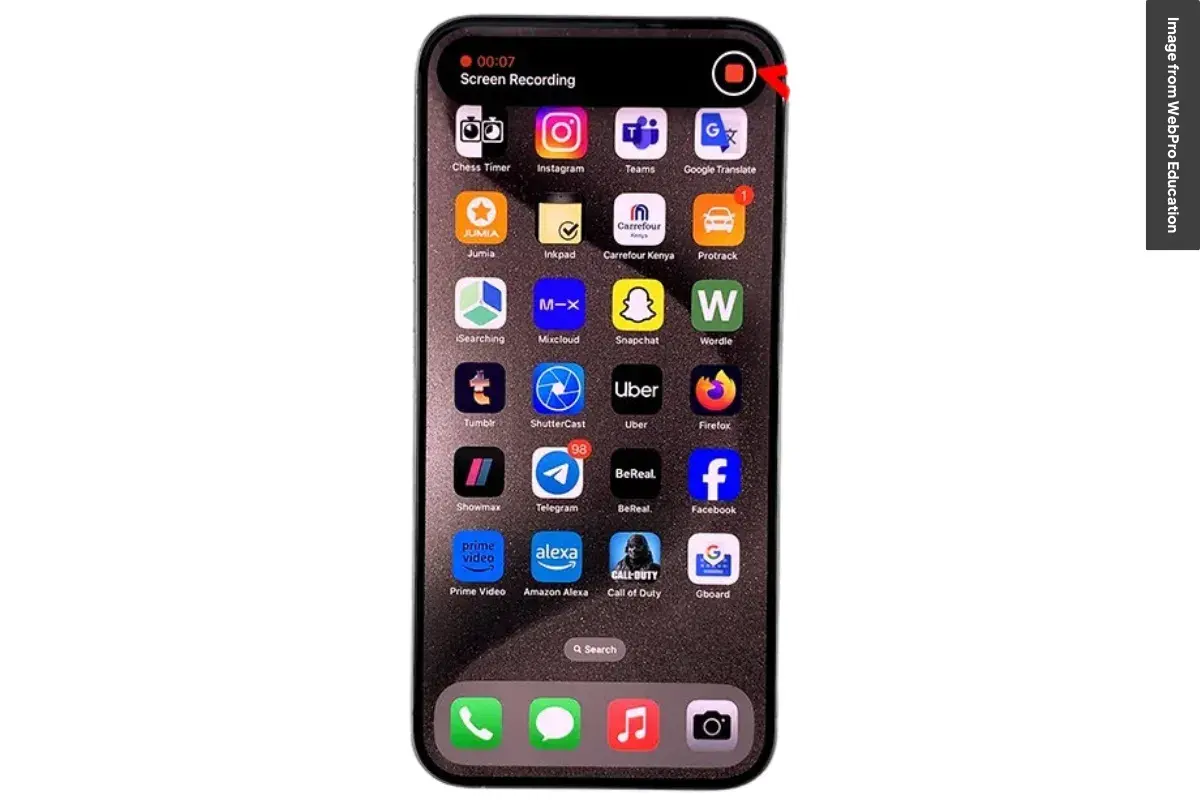
To stop recording, tap the red status bar or the Dynamic Island at the top of the screen.
3. Add Audio or Adjust Options
Record a voiceover or modify settings before you start.
Press and hold the Screen Recording icon.
Toggle Microphone on if you want to include your voice.
All recordings save automatically to the Photos app under Screen Recordings.
Video files are stored directly in your library for quick editing or sharing. Note that some apps may restrict screen recording for privacy reasons.
How to Screen Record on iPhone 15 Without an App
If you’ve been wondering how to screen record on iPhone 15 without an app, the process is actually quick once everything is set up. Here’s a simplified step-by-step version you can follow right away.
Add Screen Recording to Control Center
Open Settings → Control Center
Find Screen Recording under More Controls
Tap the green + to add it
Rearrange position if needed
Look for the circle-within-a-circle icon in Control Center
Start Screen Recording
Swipe down from the top-right corner to open Control Center
Tap the Screen Recording icon (3-second countdown starts)
For audio: long-press the icon → tap Microphone (turns red)
Record With Microphone Audio
Open Control Center → long-press the recording icon
Tap the microphone to enable voice narration
Tap Start Recording
Stop the Recording
Tap the red status indicator in Dynamic Island/top bar → choose Stop
Or tap the Screen Recording icon again in Control Center
Video saves automatically to Photos → Recents/Videos
Activate Siri: Say “Hey Siri” or press and hold the Side button. You can do this from the Lock Screen, Home Screen, or most apps.
Give the Recording Command: Use one of these voice commands:
“Hey Siri, record my screen”
“Hey Siri, record screen”
“Hey Siri, start screen recording”
The recording begins instantly, and you’ll see a red indicator in the Dynamic Island or status bar.
Understand how Audio Records: System and app audio are captured automatically.
If you want your voice included, enable the microphone once via Control Center by long-pressing the Screen Recording icon and turning on Microphone. Siri cannot switch the mic on for you.
How to Use Quick Settings for Screen Recording on Your iPhone 15
If you want to record your iPhone 15 screen quickly, using Quick Settings is a straightforward method. Here’s how you can do it in just a few easy steps:
Swipe down from the top-right corner of your screen to open Control Center.
Tap the + button or select Customize Controls to manage available shortcuts.
Scroll to Screen Recording (the circle-with-dot icon) and tap the green + to add it.
Drag the control to reposition it for quicker access.
Alternatively, you can add it through Settings > Control Center.
Tips for Recording High-Quality Screen on iPhone 15
Check Microphone Access: Open Control Center, long-press the Screen Recording icon, and make sure the Microphone is turned on. This fixes cases where recordings play with no sound.
Verify Screen Time Restrictions: Go to Settings > Screen Time > Content & Privacy Restrictions and confirm that Screen Recording is allowed. Restrictions can silently block the feature even if the button appears active.
Restart the Device: Hold the Side button and either volume button, turn off your iPhone, wait 30 seconds, then power it back on. A restart clears temporary glitches affecting the recording process.
Confirm Available Storage: Open Settings > General > iPhone Storage and ensure you have enough free space. Low storage can cause recordings to stop abruptly or fail to save.
Turn Off Low Power Mode: Check Settings > Battery and disable Low Power Mode. This mode can limit background tasks and interfere with screen recording performance.
Update to the Latest iOS Version: Go to Settings > General > Software Update and install any available updates. Newer iOS versions often fix bugs that impact screen recording.
Reset All Settings: Navigate to Settings > General > Reset > Reset All Settings. This resets system configurations without deleting your data and can resolve persistent setting conflicts.
Restart the Recording Session: Close the app you’re trying to record, reopen it, and start a fresh recording. This resolves temporary app-specific issues that may interrupt the recording.
Here is the full FAQ section answering the most common questions about screen recording on iPhone 15.
1. Why can’t I find the screen record button on my iPhone 15?
If the button doesn’t appear, the feature likely hasn’t been enabled. Here’s how to add it:
Go to Settings → Control Center.
Find Screen Recording under More Controls.
Tap the green plus icon to add it to the panel.
2. How do I turn on the microphone while screen recording?
To record your voice, you need to enable the microphone manually. Here’s how:
Press and hold the Screen Recording icon.
Tap the Microphone button until it turns red.
Start recording as usual.
3. Why is my iPhone 15 screen recording silent?
A silent recording is usually caused by one of the following:
The microphone is off.
Silent Mode is enabled, or the volume is too low.
Certain apps block audio recording due to copyright protection.
4. Can I record audio from calls or FaceTime with screen recording?
No, the iPhone 15 does not allow recording audio from calls or FaceTime. Apple restricts this for privacy and legal reasons, so the system automatically mutes audio when recording during a call.
5. Where do my screen recordings go on iPhone 15?
All screen recordings are automatically saved in the Photos app. You’ll find them in:
The Recents album
The dedicated Screen Recordings album
6. Why is my screen recording showing a black screen on Netflix or Disney+?
Streaming apps use DRM protection, which blocks captured visuals. That’s why recording content from apps like Netflix or Disney+ results in a black screen.
7. How do I stop a screen recording on iPhone 15?
You can stop recording in two ways:
Tap the red indicator in the Dynamic Island or at the top of the screen, then select Stop.
Or reopen Control Center and tap the Screen Recording icon again.
8. How long can I screen record on iPhone 15?
There’s no system-imposed time limit. You can record as long as your storage and device temperature remain safe. If the phone overheats or storage runs out, the recording may stop automatically.
9. Does iPhone 15 screen recording capture notifications?
Yes, any notifications that appear while recording will be captured. Turn on Do Not Disturb or Focus Mode if you want a clean, distraction-free recording.
10. Can I edit my screen recordings on iPhone 15?
Yes, you can perform basic edits directly in the Photos app. You can:
Trim video length
Adjust audio
Crop or apply filters
For advanced editing, you can export the video to a third-party editing app.
Conclusion
Learning how to screen record on iPhone 15 ultimately comes down to knowing where the controls are and setting them up once. After that, starting a recording becomes a quick, no-friction action you can rely on anytime you need it.
With the feature ready in Control Center, you can easily capture tutorials, save important moments, or share clear explanations without extra apps or complicated tools. It’s a small setup step that pays off every time you need to record something on the fly.
Give it a try the next time you want to save what’s happening on your screen. And if you already use screen recording regularly, feel free to share your tips or experiences—someone else might find them helpful too.
A technology writer with 5 years of professional experience as a WordPress Developer and SEO Specialist. Focused on covering apps, gadgets, and the latest digital trends, while creating SEO-friendly content that helps readers stay informed and businesses grow their online presence.