Physical Address
304 North Cardinal St.
Dorchester Center, MA 02124
Physical Address
304 North Cardinal St.
Dorchester Center, MA 02124

Your Guide to the Latest in Tech
Your Guide to the Latest in Tech
Ruminesia – Starting Harvest Moon: Back to Nature is exciting, but it can also be a little overwhelming. With so many activities available from day one, it’s easy to wonder what to prioritize first. That’s why having a Harvest Moon Back to Nature walkthrough can help you avoid common mistakes and make steady progress from the very beginning.
The interesting thing is that success isn’t about making the most money as quickly as possible. Small decisions—like choosing the right crops, upgrading your tools at the right time, and befriending the Harvest Sprites early—can make the rest of the game much easier.
Whether you’re returning to Mineral Town or playing it for the first time, this guide will walk you through every season, from your first Spring to the Mayor’s final evaluation, so you can build a successful farm while enjoying everything the game has to offer.
Key Highlight
- Build a consistent routine during your first week to make every following season easier.
- Focus on profitable seasonal crops instead of planting everything available.
- Befriend the Harvest Sprites early to automate farm chores and save valuable time.
- Upgrade tools strategically, especially the Watering Can, to improve daily efficiency.
- Balance farming, mining, fishing, and relationships for steady long-term progress.
- Prepare for each new season instead of reacting after it begins.
Starting a new game in Harvest Moon: Back to Nature can feel surprisingly overwhelming, especially if it’s your first time playing. You’re handed an abandoned farm, a handful of basic tools, and only one clear objective: prove to the Mayor that you deserve to inherit your grandfather’s land within three years.
At first glance, the game seems relaxed. You can grow crops, raise animals, fish, mine, attend festivals, or simply spend the day talking to villagers. But what many players don’t realize is that every season presents different opportunities, and the choices you make during the first few weeks can significantly affect your progress later.
That’s exactly why this Harvest Moon: Back to Nature walkthrough is organized chronologically. Instead of explaining each game mechanic separately, this guide follows the natural flow of the game—from your very first morning on the farm to building a thriving ranch, getting married, and successfully passing the Mayor’s final evaluation.
Whether you’re revisiting this PlayStation classic or experiencing Mineral Town for the first time, you’ll find practical strategies, efficient routines, and long-term planning tips that make progression much smoother without taking away the fun of discovering the game yourself.
Unlike many modern farming simulators, Harvest Moon: Back to Nature isn’t endless from the start. Your progress is measured over three years.
At the end of Year 3, Mayor Thomas evaluates your farm based on several factors, including:
If your farm has grown into a successful operation and you’ve built good relationships with the townspeople, you’ll be allowed to stay and continue playing indefinitely.
The good news is that this objective is much more forgiving than it sounds.
You don’t need to maximize every statistic or complete every hidden event. Instead, focus on creating a stable source of income, upgrading your tools, expanding your farm, and becoming an active member of the community. If you consistently make progress each season, passing the final evaluation is usually straightforward.
Think of the three years as a long-term journey rather than a race. The game rewards steady progress far more than trying to optimize everything immediately.
Before jumping into daily routines and seasonal strategies, it’s worth understanding a few habits that make the entire game easier.
These aren’t complicated tricks or exploits. They’re simple practices that experienced players naturally develop over time.
The television is one of the most valuable tools in your house.
Checking the weather forecast lets you plan your next day efficiently. If rain is expected tomorrow, you can avoid unnecessary watering today and spend more time mining, fishing, or clearing your farm.
Besides that, don’t ignore the Cooking Channel. New recipes become permanently available once you’ve watched the corresponding episode, making it much easier to complete your recipe collection later.
Making the TV your first stop every morning only takes a few in-game minutes but often saves hours of work throughout the season.
One of the biggest mistakes new players make is spending their first week chopping every branch and smashing every rock on the farm.
The problem is that your starting tools consume a lot of stamina, while your character has very limited energy during the early game. By the time you’ve cleared half the field, you may not have enough stamina left to plant crops, forage, or explore Mineral Town.
Instead, clear only the area you actually need.
Create enough space for your first crops near the shipping bin, leave the rest for later, and use your remaining stamina on activities that generate money.
In practice, earning extra income early is much more valuable than having a perfectly clean farm.
Time moves surprisingly fast in Harvest Moon: Back to Nature.
Walking back and forth across Mineral Town multiple times each day wastes valuable hours that could be spent earning money or improving relationships.
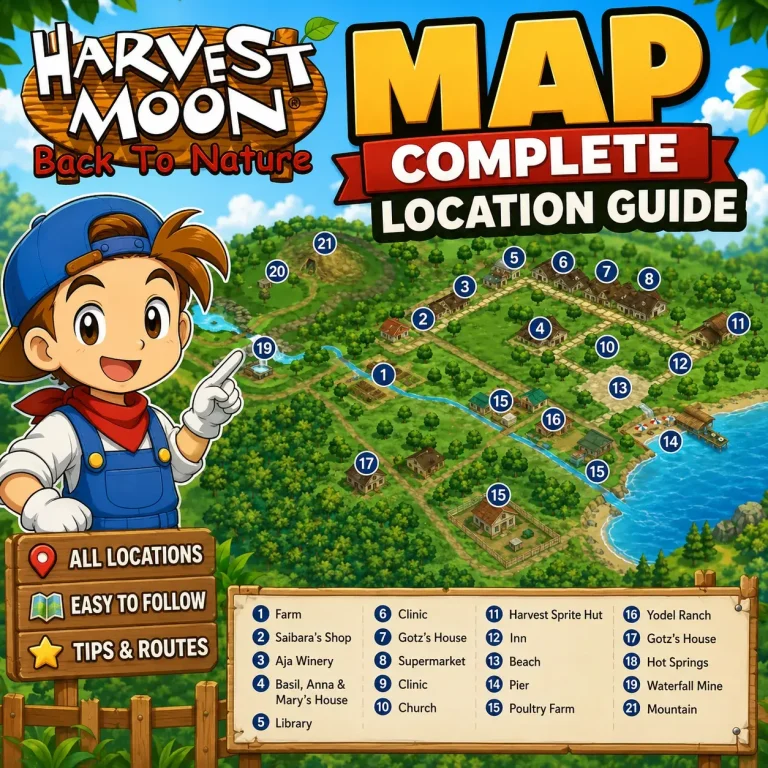
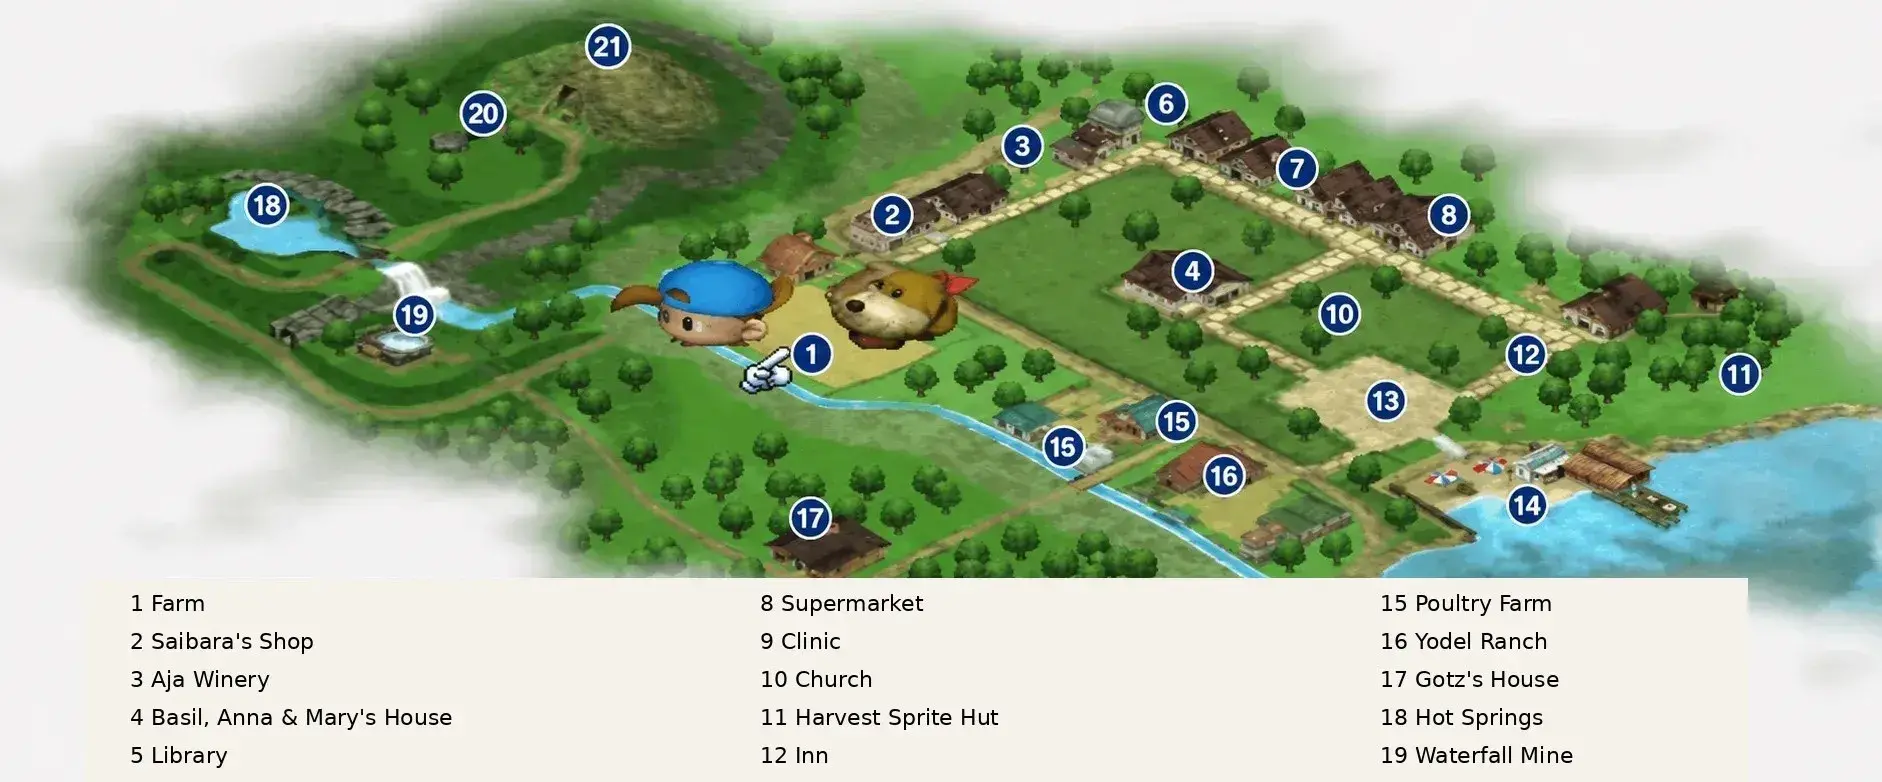
During your first couple of days, take the opportunity to familiarize yourself with important locations, including:
Once you naturally remember where everything is, planning efficient daily routes becomes much easier.
Interestingly, experienced players rarely travel without combining several objectives into one trip—for example, foraging on Mother’s Hill, restoring stamina at the Hot Springs, mining nearby, and then returning home before evening.
That small habit alone saves an incredible amount of time throughout the game.
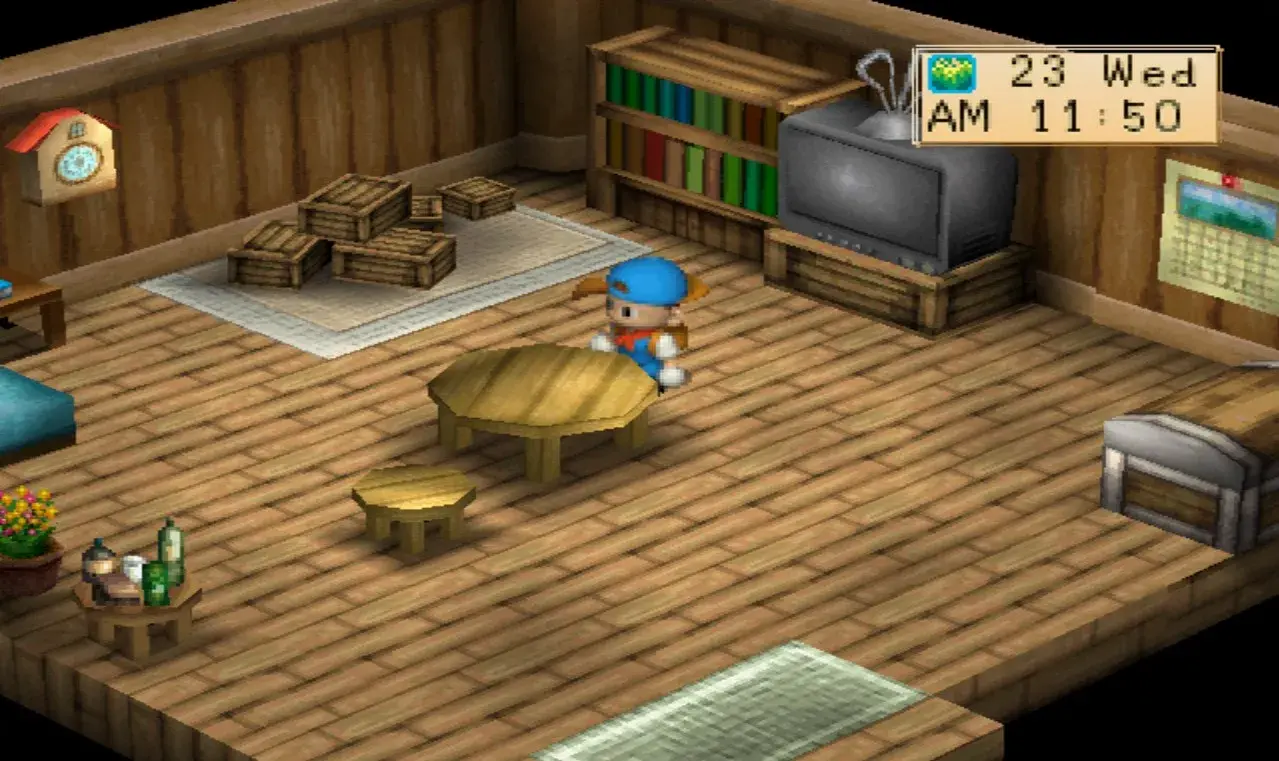
The first week is easily the most important part of the entire game.
Your goal isn’t to become rich overnight. Instead, you’re laying the foundation that supports everything you’ll accomplish over the next three years.
If you establish a reliable routine now, the following seasons become much easier to manage.
After waking up, you’ll receive your basic farming tools.
Although it’s tempting to clean the entire farm immediately, resist the urge. Focus on clearing only a small patch of land near the shipping bin.
Buy several bags of Turnip Seeds from the Supermarket as soon as it opens. Turnips grow quickly and provide your first consistent source of income, making them the ideal starter crop.
Plant and water them immediately before spending the rest of your stamina exploring.
If time allows, visit Mother’s Hill to collect Bamboo Shoots, edible herbs, and other forage items. Shipping these items gives you useful starting income without requiring any investment.
Before ending the day, remember to ship everything you’ve collected.
Your first day isn’t about making huge profits—it’s about creating momentum.
Once your crops are planted, it’s time to shift some of your attention toward Mineral Town itself.
Many new players spend every waking hour working on the farm, but Harvest Moon: Back to Nature rewards players who build relationships early. Besides unlocking heart events and future marriage options, talking to villagers also makes the town feel more alive and helps you become familiar with everyone’s schedules.
During your first two days, try to introduce yourself to as many residents as possible. Don’t worry about giving gifts yet if you don’t have suitable items. Simply speaking to people every day is enough to begin raising friendship little by little.
While walking through town, take note of the locations you’ll visit frequently throughout the game:
Besides learning the map, this exploration naturally introduces you to the five marriage candidates—Ann, Elli, Karen, Mary, and Popuri. Even if you haven’t decided who to marry, meeting them early allows future heart events to trigger without unnecessary delays.
The goal during these two days isn’t efficiency alone. You’re building familiarity with Mineral Town, and that knowledge saves an incredible amount of time as the seasons progress.
By now, your Turnips are growing, but crops alone won’t generate enough income to support your long-term goals.
This is the perfect time to establish a simple routine that you’ll repeat throughout most of the first year.
A reliable day often looks like this:
At first, mining isn’t about finding rare minerals. Copper Ore, Silver Ore, and even ordinary materials provide extra income while gradually preparing you for future tool upgrades.
Meanwhile, forage items such as Bamboo Shoots and medicinal grasses are surprisingly valuable during Spring because they cost nothing to obtain. Many experienced players rely on them as their primary source of income until larger crop harvests become available.
Interestingly, this routine also trains you to manage stamina efficiently. Rather than exhausting yourself by clearing the farm all day, you’re balancing farming, exploration, mining, and profit in a way that keeps every day productive.
Once this rhythm becomes second nature, progressing through the rest of Year 1 feels much more natural.
Your first major investment shouldn’t be expensive equipment.
It should be a chicken.
As soon as you’ve earned around 1,500 G, visit the Poultry Farm and purchase your first chicken. Although the upfront cost may seem high early in the game, chickens quickly become one of the most reliable sources of steady income.
Unlike crops, chickens continue producing eggs every day with minimal maintenance.
More importantly, they can reproduce for free.
Instead of selling every egg you collect, place one normal egg inside the incubator. After a few days, it hatches into another chick, allowing you to expand your flock without buying additional animals.
This simple mechanic dramatically reduces your long-term expenses and helps establish a dependable daily income before investing in larger livestock like cows and sheep.
Besides that, caring for animals every day naturally improves your overall farm routine. Feeding them, collecting eggs, and talking to them only takes a few minutes but provides consistent rewards throughout the year.
Many experienced players consider buying the first chicken one of the biggest turning points in Spring Year 1 because it transforms your farm from relying solely on seasonal crops into generating income every single day.
By the second half of your first week, your daily routine should already feel much more stable.
Now it’s time to invest in something that pays off for the rest of the game: your friendship with the Harvest Sprites.
Behind the Church lives a group of seven tiny helpers who can eventually water crops, harvest fields, and take care of your animals. Their assistance becomes incredibly valuable once your farm grows beyond what you can comfortably manage alone.
The best part is that gaining their friendship is surprisingly easy.
Visit the Supermarket and buy several bags of Flour. It’s inexpensive, easy to carry, and one of the Harvest Sprites’ favorite gifts. Giving each Sprite Flour regularly increases their affection much faster than relying on random gifts you happen to find.
At first, it might seem like a waste of money to spend hard-earned gold on gifts instead of seeds or livestock. In practice, however, this is one of the smartest long-term investments you can make.
Once the Sprites are willing to help, you’ll spend far less time on repetitive chores and gain extra hours each day for mining, fishing, socializing, or expanding your farm.
Many experienced players start building these friendships during the very first Spring because waiting until Summer often means missing out on weeks of free labor.
While following your daily routine, make time to visit the Beach during the morning whenever possible.
If you meet Greg under the right conditions, he’ll give you the Fishing Rod for free.
Many new players accidentally delay getting this tool simply because they don’t know the event exists. Although it’s not permanently missable, obtaining it early opens another reliable source of income.
Fishing works especially well on days when your stamina is running low or when you’ve already finished watering crops. Instead of ending the day early, you can catch fish and ship them for additional profit.
Besides making money, fishing also becomes much more useful during Winter, when outdoor farming is unavailable, and you’ll naturally rely on alternative activities.
Simply put, the earlier you unlock fishing, the more opportunities you’ll have to earn extra income throughout the year.
One mistake many first-time players make is rushing to upgrade their tools as soon as they obtain enough ore.
While upgrading is essential, timing matters just as much.
Each tool remains at the Blacksmith for several days, meaning you won’t be able to use it during that period. Losing access to the wrong tool at the wrong time can slow your progress significantly.
The Watering Can is the best example.
Instead of upgrading it immediately, wait until the weather forecast predicts rain for the following day. Since rain waters every crop automatically, you won’t lose valuable growing time while Saibara works on the upgrade.
The same principle applies to your other tools.
Upgrade them gradually as your farm expands rather than trying to improve everything at once. This approach keeps your daily routine running smoothly while steadily increasing your efficiency over time.
By the end of your first week, you don’t need to have a perfect farm.
Instead, focus on building habits that will support the rest of Year 1.
Ideally, you should have accomplished most of the following:
If you’ve checked off most of these milestones, you’re already in an excellent position.
From here, the game begins to open up. Rather than worrying about surviving day by day, you’ll start thinking about bigger goals—earning more money, upgrading your farm, expanding your livestock, and preparing for the next season.
With your foundation in place, it’s time to focus on the first full season of your adventure.
Spring is all about building momentum.
Although your profits won’t be particularly high yet, the decisions you make during this season have a lasting impact on the rest of the game. Every crop you plant, every friendship you build, and every tool you improve makes Summer, Fall, and Winter considerably easier.
Instead of trying to do everything at once, focus on strengthening the core systems that keep your farm growing steadily. Think of Spring as the season where you’re investing in your future rather than chasing immediate profits.
Once your first week is behind you, your primary source of income should still come from crops.
At this stage, resist the temptation to plant a little bit of everything. While experimenting is part of the fun, focusing on a small number of profitable crops usually produces much better results during your first Spring.
Turnips remain one of the strongest choices because they mature quickly and generate steady cash flow. Their short growing time means you can harvest multiple batches before the season ends, giving you enough money to expand your farm without waiting too long between harvests.
As your finances become more comfortable, consider adding Potatoes or Cucumbers to diversify your income. If Won is available in your game, Cabbage is also an excellent long-term investment thanks to its high selling price, although it requires more patience before the first harvest.
Besides choosing the right crops, think about your field layout.
Rather than planting randomly, organize crops into neat 3×3 plots with enough walking space between them. This simple habit saves time every morning and becomes even more valuable after upgrading your Watering Can.
The goal isn’t to create the biggest farm possible during Spring. Instead, aim for a field that’s easy to maintain while still leaving enough stamina for mining, fishing, and building relationships.
Making more money often encourages players to buy as many seeds as possible.
Ironically, that’s not always the fastest way to progress.
The problem is that every additional crop also requires more stamina, more watering, and more time. If your farm grows faster than your ability to manage it, you’ll spend every day doing chores with little energy left for anything else.
Instead of expanding too aggressively, invest in your overall efficiency first.
Continue using your tools every day, so they gain experience naturally. Even swinging them in an empty area contributes toward future upgrades, although regular farm work usually provides enough usage over time.
When you’ve collected the necessary ore from the Waterfall Mine, begin upgrading your tools gradually. A stronger Watering Can reduces the amount of time spent watering, while improved farming tools make clearing land significantly less exhausting.
In practice, efficiency upgrades often produce greater long-term profits than simply planting more crops.
The faster you finish your daily work, the more opportunities you’ll have to earn extra income elsewhere.
Mining is easy to overlook during Spring because the Waterfall Mine doesn’t contain the game’s rarest materials.
However, skipping it entirely creates problems later.
The ores you collect now become essential for upgrading tools throughout the first year, and selling surplus minerals provides a useful source of extra income between crop harvests.
You don’t need to spend the entire day underground.
Instead, think of mining as one stop along your regular route.
After watering crops and gathering forage items around Mother’s Hill, recover your stamina at the nearby Hot Springs before entering the mine. Dig until your energy starts running low, then head home and ship everything before evening.
Besides ore, you’ll gradually become familiar with how mining works, making future trips into the Winter Mine much less intimidating.
Consistency matters far more than marathon mining sessions.
Even short visits each day produce impressive results over the course of an entire season.
Spring isn’t only about making money.
It’s also the best time to establish friendships that continue paying dividends throughout the rest of the game.
Whenever you’re passing through town, take a moment to speak with villagers instead of rushing straight to your destination. Conversation takes almost no time but steadily increases friendship, unlocking festivals, rival events, heart events, and various character interactions later on.
If you’ve already decided who you’d like to marry, begin giving small daily gifts whenever possible. Flowers, eggs, milk, Bamboo Shoots, and other easy-to-find items are often enough to make consistent progress during the early game.
Besides the marriage candidates, don’t forget the Harvest Sprites.
Continue bringing them Flour regularly until they’re ready to work on your farm. Their help becomes one of the biggest quality-of-life improvements you’ll unlock during Year 1.
By treating friendship as part of your normal daily route rather than a separate task, you’ll naturally progress both your farm and your social life at the same time—a balance that lies at the heart of Harvest Moon: Back to Nature.
Besides farming, Spring is also your introduction to the social side of Mineral Town.
Festivals may not seem particularly rewarding at first, especially if your main focus is making money. However, participating in them helps strengthen relationships with villagers and creates memorable moments that make the town feel alive.
The New Year’s Festival has already passed when you begin the game, but you’ll still have opportunities to join events such as the Flower Festival and other seasonal celebrations.
Whenever possible, attend these festivals instead of treating them as a wasted day.
Although you won’t earn direct profits, you’ll often gain friendship points with multiple villagers at once. This makes future heart events, marriages, and even the Mayor’s final evaluation much easier later in the game.
One thing many players overlook is that Harvest Moon: Back to Nature isn’t designed as a race toward maximum profit. Becoming part of the community is just as important as building a successful farm.
Festivals are one of the easiest ways to accomplish both.
Spring gives you plenty of freedom, but it’s also where most beginners accidentally slow down their long-term progress.
Here are some mistakes worth avoiding:
Interestingly, none of these mistakes are game-ending.
However, avoiding them makes the rest of Year 1 significantly smoother and allows you to focus on expanding your farm rather than recovering from inefficient decisions.
Before Summer arrives, your farm doesn’t need to look impressive.
Instead, measure your progress by the foundation you’ve built.
Ideally, you should have achieved most of the following goals:
If you’re missing one or two items, don’t panic. Harvest Moon: Back to Nature is surprisingly forgiving, and there’s still plenty of time to recover.
The important thing is that your daily routine now feels consistent. You should no longer be wondering what to do each morning—instead, you’ll naturally move from watering crops to foraging, mining, socializing, and caring for your animals without wasting much time.
That rhythm is exactly what prepares you for the next season.
If Spring is about building a foundation, Summer is where your farm begins generating real wealth.
You’ll gain access to some of the most profitable crops in the game, unlock more opportunities to upgrade your tools, and rely increasingly on the systems you’ve been building since the first week.
This is also the point where many new players accidentally overwhelm themselves.
Larger fields, more animals, and additional daily chores can quickly consume every hour if you haven’t planned.
The good news is that, by following the routines established during Spring, you’re already in a strong position. Now it’s simply a matter of scaling your farm wisely rather than expanding as quickly as possible.
Summer is widely considered the season where your financial progress starts accelerating.
After spending Spring establishing a stable routine, you should now have enough savings to invest in crops with much higher returns. Instead of chasing quick harvests, begin thinking about long-term profitability.
If Won is available in your game, Pineapples deserve your highest priority. Although they take longer to mature than most crops, they continue producing multiple harvests throughout the season, making them one of the most profitable investments in Harvest Moon: Back to Nature.
Besides Pineapples, Corn is another excellent option. While it doesn’t generate as much profit per harvest, it regrows after being picked and can also be used as chicken feed later. This flexibility makes it valuable even if you’re focusing more on raising livestock.
The biggest mistake during Summer is spending every last coin on seeds.
Always leave yourself with a small financial reserve. Unexpected expenses—such as livestock purchases, tool upgrades, or supplies—are much easier to handle when you aren’t completely broke after visiting the Supermarket.
As your crop fields become larger, don’t feel pressured to plant every available tile. It’s far better to maintain a slightly smaller field that you can water each day comfortably than to create a massive farm that drains all of your stamina before noon.
A sustainable routine almost always outperforms an overly ambitious one.
By now, the Flour you’ve been giving the Harvest Sprites throughout Spring should finally start paying off.
Instead of handling every task yourself, begin hiring them to help with farm work.
Watering crops is usually the best job to delegate first because it consumes the most time and stamina every morning. As your fields continue expanding, having even a few Sprites working alongside you dramatically increases your daily efficiency.
The difference is surprisingly noticeable.
Rather than spending half the day watering crops, you’ll finish your farm chores much earlier and have enough time to visit the mine, go fishing, gather forage items, or strengthen your relationships with villagers.
Many players underestimate just how powerful the Harvest Sprites become during Summer.
In practice, they represent one of the largest productivity upgrades in the entire game. Unlike better tools or larger fields, Sprite assistance effectively gives you extra working hours every single day.
Continue giving them gifts regularly, even after they’re willing to work.
Maintaining high friendship ensures they’ll remain dependable helpers throughout the busiest parts of the year.
With crop profits increasing, it’s tempting to buy several animals at once.
While your income may finally support larger investments, expanding too quickly often creates unnecessary pressure.
A better approach is to grow your livestock little by little.
If you’ve been incubating eggs since Spring, your chicken coop should already be growing naturally without requiring additional purchases. Continue using the incubator whenever possible, allowing your flock to expand almost entirely for free.
Once your daily income feels stable, begin saving for your first cow.
Unlike chickens, cows require a larger initial investment and more daily care. However, milk becomes one of the most reliable sources of income throughout the rest of the game, especially after you unlock processing equipment later.
The important thing is balance.
Your animals should complement your farming routine—not replace it.
If feeding livestock, watering crops, and maintaining friendships leave you exhausted before noon, you’ve probably expanded faster than your current tools and stamina can comfortably support.
Steady growth always wins over rapid expansion in the long run.
Summer is an ideal time to continue upgrading your equipment because your income is becoming much more consistent.
If you’ve been visiting the Waterfall Mine regularly since Spring, you should already have enough ore to improve several tools.
Prioritize upgrades that directly reduce your daily workload.
The Watering Can remains one of the highest priorities, followed closely by the Hammer and Axe, since clearing large obstacles becomes increasingly common as your farm expands.
Remember not to send multiple essential tools to Saibara at the same time.
Losing access to both your Watering Can and Axe, for example, can interrupt your entire routine for several days.
Instead, upgrade one tool, continue playing normally, then move on to the next when it’s returned.
This gradual approach keeps your farm productive while steadily improving your efficiency throughout the season.
By the end of Summer, routine tasks that once consumed an entire morning should only require a fraction of the time, giving you far more freedom to focus on the parts of the game you enjoy most.
Summer isn’t only about earning more money—it’s also another opportunity to strengthen your connection with the people of Mineral Town.
Throughout the season, you’ll have the chance to participate in several festivals, including the Fireworks Festival, Tomato Festival, and Cow Festival if you’ve already started raising livestock.
While these events don’t directly increase your income, they contribute to one of the game’s most rewarding aspects: building relationships.
Attending festivals regularly helps improve friendship with multiple villagers, creates opportunities to spend time with your favorite marriage candidate, and makes the town feel much more immersive than simply treating every day as another farming session.
Interestingly, many experienced players purposely finish their daily chores as early as possible on festival days. That way, they can fully enjoy the event without worrying about unfinished work back on the farm.
Remember, Harvest Moon: Back to Nature isn’t only about maximizing profit. The game is designed around balancing work with community life, and festivals are one of the best reminders of that philosophy.
Before the season changes, take a moment to evaluate your progress.
Ideally, your farm should now feel much more established than it did during Spring.
By the end of Summer, try to accomplish most of these goals:
Don’t worry if every box isn’t checked.
The purpose of these milestones isn’t perfection—it’s ensuring your farm is moving steadily in the right direction.
If your daily routine feels organized and you’re ending most days with extra money rather than barely breaking even, you’re exactly where you should be.
That steady progress becomes especially important because the next season offers the single biggest opportunity to grow your wealth.
For many players, Fall is the most profitable season in Harvest Moon: Back to Nature.
By now, the investments you made throughout Spring and Summer finally begin paying off. Your upgraded tools reduce daily chores, the Harvest Sprites can handle part of your workload, and your farm should already have several reliable sources of income.
This is the perfect time to shift your focus from simply earning enough money to building long-term financial stability.
Rather than experimenting with different crops, Fall rewards players who fully commit to its strongest options.
With proper planning, it’s entirely possible to earn more money during this single season than you did throughout the first half of the year combined.
If there’s one crop that defines Fall, it’s the Sweet Potato.
Among experienced players, Sweet Potatoes are widely regarded as the best money-making crop in the entire game. Their greatest strength isn’t just their selling price—it’s how quickly they regrow after the first harvest.
Once mature, they can be harvested repeatedly every few days, creating a steady stream of income for the remainder of the season without requiring additional seed purchases.
Because of this, your priority when Fall begins should be purchasing as many Sweet Potato seeds as you can comfortably manage.
That said, don’t make the mistake of planting more than you can realistically maintain.
Even with upgraded tools and help from the Harvest Sprites, every additional crop still requires time and stamina. A slightly smaller field that receives proper care will almost always outperform a massive field that’s difficult to maintain consistently.
If you still have extra space after planting Sweet Potatoes, consider adding a few Eggplants or Carrots for variety. However, these should complement your farm—not replace your primary source of income.
The more efficiently you manage your Sweet Potato harvests throughout Fall, the easier the rest of the game becomes.
Many players finish the season with enough savings to upgrade their house, purchase more livestock, and prepare comfortably for Winter, all thanks to this single crop.
Fall isn’t just the best season for making money—it’s also the best time to invest it.
With Sweet Potatoes bringing in a steady flow of gold, you’ll finally have the financial freedom to improve your farm instead of constantly worrying about your next harvest.
Rather than spending everything on more seeds, start thinking about upgrades that continue benefiting you well into Year 2.
If your house still feels cramped, begin saving for house expansions. Larger upgrades eventually unlock important features such as the kitchen and larger bed, both of which become essential if you’re planning to get married later.
This is also an excellent opportunity to expand your livestock.
Adding another cow or increasing your flock of chickens creates additional daily income that isn’t tied to crop seasons. Unlike farming, animals continue producing resources throughout the year, making them one of the most reliable long-term investments.
Besides that, continue improving your tools whenever possible.
By this stage, higher-level tools should noticeably reduce the amount of time spent watering crops, clearing debris, and working around the farm. Those saved hours become increasingly valuable as more activities compete for your attention.
Think of Fall as the season where your farm begins transforming from a small family plot into a self-sustaining business.
One of the biggest mistakes players make is treating Winter as just another farming season.
The problem is that outdoor crops stop growing entirely.
Without preparation, many players suddenly discover that their biggest source of income has disappeared overnight.
Fortunately, avoiding this situation is simple.
Before the last days of Fall, make sure you’ve built a comfortable financial cushion. Having extra savings allows you to focus on mining, upgrading tools, and strengthening relationships during Winter without worrying about daily expenses.
If you’re raising livestock, stock up on enough fodder to feed your animals throughout the season. Although chickens and cows continue producing eggs and milk, they’ll still require regular care every day.
It’s also worth finishing any important tool upgrades before Winter begins, especially if those tools will help you spend more time exploring the Winter Mine once farming slows down.
Preparing ahead means Winter feels like an opportunity rather than an obstacle.
As Fall comes to an end, your farm should look dramatically different from the one you inherited at the beginning of Spring.
Before Winter arrives, try to complete most of these milestones:
Reaching every goal isn’t mandatory.
What’s more important is that your farm now generates income from multiple sources rather than depending on a single harvest. Crops, livestock, mining, fishing, and friendships should all be progressing together.
This balanced approach makes the transition into Winter much smoother.
Winter completely changes the pace of Harvest Moon: Back to Nature.
With snow covering your fields, outdoor farming temporarily comes to a halt. At first, this can make the season feel less productive than the others.
In reality, Winter is one of the most valuable seasons in the entire game.
Instead of spending every morning watering crops, you’ll have far more time to explore the Winter Mine, collect rare ores, upgrade your equipment, improve relationships with villagers, and prepare your farm for an even stronger second year.
Many experienced players actually look forward to Winter because it offers something the other seasons rarely do: uninterrupted time to invest in long-term progression.
Rather than seeing it as a break from farming, think of Winter as your opportunity to strengthen every part of the game that isn’t directly tied to crops.
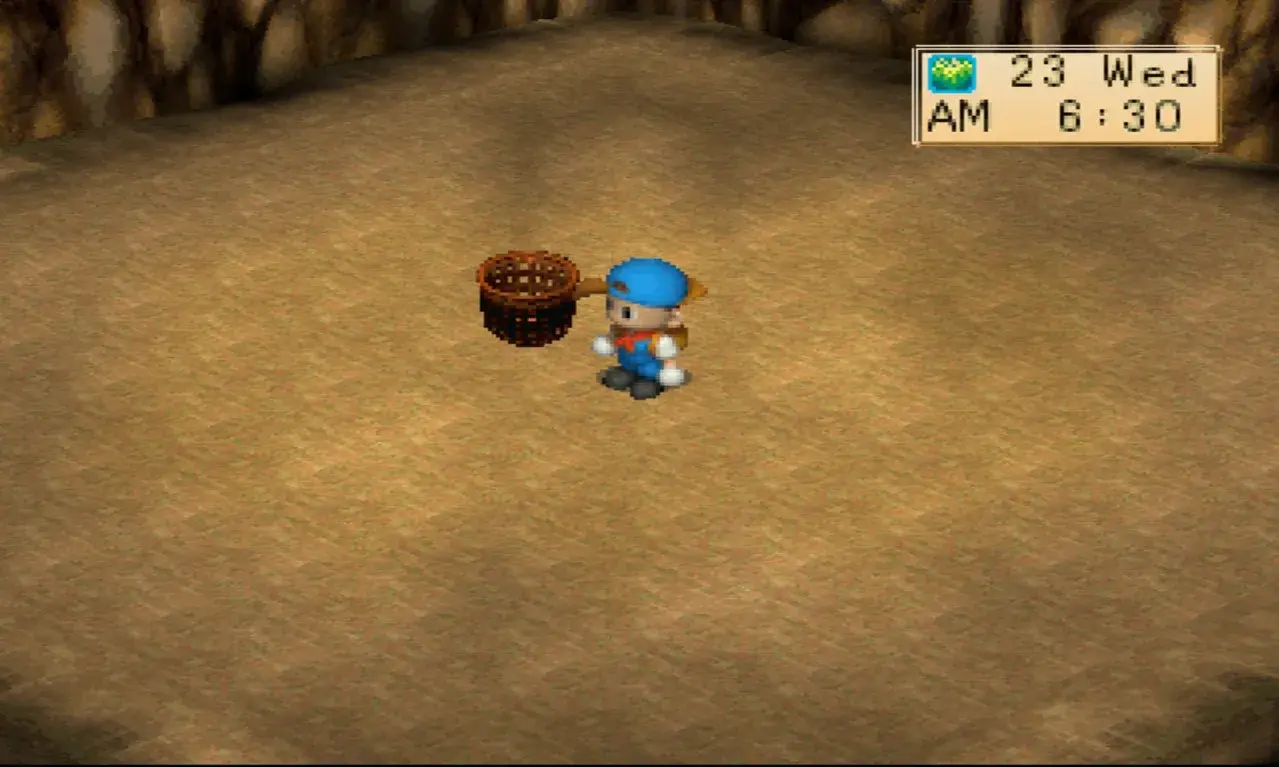
Without crops demanding your attention every morning, the Winter Mine should become your primary destination.
Compared to the Waterfall Mine, this mine contains much more valuable materials that are essential for late-game progression. Here you’ll eventually discover rare ores used for higher-level tool upgrades and other important equipment.
Unlike Spring and Summer, where mining often fits into your daily routine, Winter allows you to dedicate much longer sessions underground.
A typical Winter day can be surprisingly simple:
Don’t expect to reach the deepest floors immediately.
Learning how the mine works, managing stamina efficiently, and collecting resources consistently is far more important than rushing downward.
Every successful mining trip brings you closer to fully upgraded tools, which will make Year 2 considerably easier than your first year ever was.
While most of your crop income disappears during Winter, your overall progress shouldn’t stop.
Instead of measuring success by how much gold you earn each day, focus on improving the systems that will make Year 2 far more efficient.
Continue using the Winter Mine to gather higher-quality ores, then visit Saibara whenever you’re ready to upgrade another tool. By now, your goal should be working toward Mystrile tools, as they significantly reduce both stamina consumption and the time needed for everyday farm work.
Winter is also an excellent opportunity to reorganize your priorities.
Without fields demanding constant attention, you can spend more time fishing, collecting Power Berries, cooking new recipes, and exploring parts of Mineral Town that you may have ignored during the busier seasons.
Interestingly, many experienced players consider Winter their “maintenance season.” Rather than chasing immediate profits, they use these weeks to strengthen every aspect of the farm before Spring arrives again.
The result is a much smoother Year 2, where daily chores feel easier, and expansion becomes much less stressful.
Just because farming slows down doesn’t mean social progress should.
In fact, Winter often provides more free time than any other season, making it the perfect opportunity to strengthen friendships throughout Mineral Town.
Continue speaking with villagers whenever your daily route takes you through town, and don’t stop giving gifts to the people who matter most.
If you’ve already chosen someone you’d like to marry, Winter is an excellent season to accelerate their affection level. Since you’re spending fewer hours on crop maintenance, you’ll naturally have more opportunities to trigger heart events and learn each character’s daily schedule.
Besides the marriage candidates, keep visiting the Harvest Sprites as well.
Even if they’re already helping around your farm, maintaining high friendship ensures they’ll remain reliable workers once the busy farming seasons return.
Remember that friendships develop through consistency rather than expensive gifts.
Small daily interactions often produce better long-term results than giving several presents all at once.
Winter is also one of the best times to begin hunting for Power Berries.
These hidden items permanently increase your maximum stamina, making every activity in the game—from farming and mining to fishing and logging—much easier.
You don’t need to collect every Power Berry immediately.
Instead, focus on the ones that naturally fit into your normal routine.
For example:
Each berry may seem like a small upgrade on its own, but together they dramatically increase your daily productivity.
Many players don’t realize how much stamina they’ve been wasting until they collect several Power Berries and notice how much longer they can work before becoming exhausted.
Think of them as permanent investments rather than optional collectibles.
Before the first year comes to an end, your farm should feel stable rather than fragile.
Use the final days of Winter to make sure you’ve accomplished most of these goals:
If you’ve reached most of these milestones, you’ve completed the hardest part of the game.
From this point onward, you’re no longer struggling to survive.
Instead, you’ll spend the second year expanding a farm that’s already profitable, efficient, and well organized.
Reaching Year 2 is where Harvest Moon: Back to Nature truly opens up.
Unlike your first year, you’re no longer learning the basics or worrying about earning enough money for tomorrow’s seeds. Your farm should already provide consistent income through crops, livestock, mining, and other activities.
Now your priorities begin to change.
Rather than simply making money, your focus shifts toward expanding your property, maximizing efficiency, preparing for marriage, and completing long-term goals that weren’t realistic during your first year.
Think of Year 2 as the transition from surviving to thriving.
The foundation has already been built.
Now it’s time to turn your small inherited farm into one of the most successful ranches in Mineral Town.
Year 2 isn’t about starting over—it’s about making smarter investments.
By now, you should already have a reliable source of income from crops, livestock, or mining. Instead of spending every season chasing quick profits, begin using your savings to improve your farm’s long-term efficiency.
House upgrades should become one of your highest priorities.
A larger house eventually unlocks the kitchen, allowing you to cook meals that restore stamina far more effectively than relying on the Hot Springs alone. Later upgrades also provide the Big Bed, which is required before you can get married.
Besides improving your home, continue expanding your barn and chicken coop at a pace you can comfortably manage. There’s no need to fill every available space immediately. Each additional animal increases your daily workload, so grow gradually instead of creating chores you can’t keep up with.
If you’ve been following this walkthrough since Spring of Year 1, your upgraded tools and Harvest Sprites should already make daily farm work much easier. That extra efficiency is exactly what allows you to expand without feeling overwhelmed.
Remember, the goal isn’t simply to own a larger farm.
It’s to build one that’s profitable, organized, and enjoyable to manage every single day.
While crops remain an important source of seasonal income, livestock gradually becomes one of the most dependable parts of your farm.
Unlike crops, animals continue producing valuable resources regardless of the season, making them a reliable foundation for your economy.
By Year 2, try to establish a balanced livestock operation.
Continue raising chickens through incubation whenever possible, since expanding your flock this way costs nothing beyond a little patience.
At the same time, begin increasing the number of cows if your finances allow it. Daily milk sales provide consistent income throughout the year, and higher-quality milk becomes even more valuable once you’ve upgraded your cows’ affection through regular care.
Don’t forget that animals require attention beyond feeding.
Talking to them every day, brushing cows, and allowing them outside during suitable weather all contribute to their happiness and product quality.
Many new players focus only on the number of animals they own.
Experienced players know that a smaller group of healthy, high-affection animals usually produces better long-term results than a large herd that’s difficult to care for properly.
By the second year, your routine should feel almost automatic.
Rather than wondering what to do each morning, you should naturally move through your daily responsibilities in an efficient order.
A typical productive day might look something like this:
The exact order isn’t as important as developing consistency.
The more predictable your routine becomes, the easier it is to notice opportunities for improvement.
For example, rainy days become perfect opportunities for mining because watering crops is no longer necessary. Festival days naturally shift your focus toward social activities, while harvest days prioritize shipping crops before anything else.
This flexibility is what separates experienced players from beginners.
Rather than following the same schedule every day, they adjust their routine based on weather, festivals, crop cycles, and personal goals.
Your tools should still be improving throughout Year 2.
If you’ve been collecting ore consistently from both mines, you should now be working toward higher-tier upgrades that significantly reduce stamina consumption and increase each tool’s working area.
Fully upgraded tools don’t just save time—they completely change how you approach daily farm work.
For example, watering large fields with a high-level Watering Can takes only a fraction of the time required during Year 1. The same is true for clearing stumps, breaking rocks, and preparing new farmland.
Whenever you’re planning another upgrade, remember the same rule you’ve followed since Spring:
Never send away an essential tool unless you’re confident you can manage without it for a few days.
Good timing keeps your farm running smoothly while your equipment continues getting stronger.
By the end of Year 2, most routine chores should feel dramatically easier than they did when you first arrived in Mineral Town.
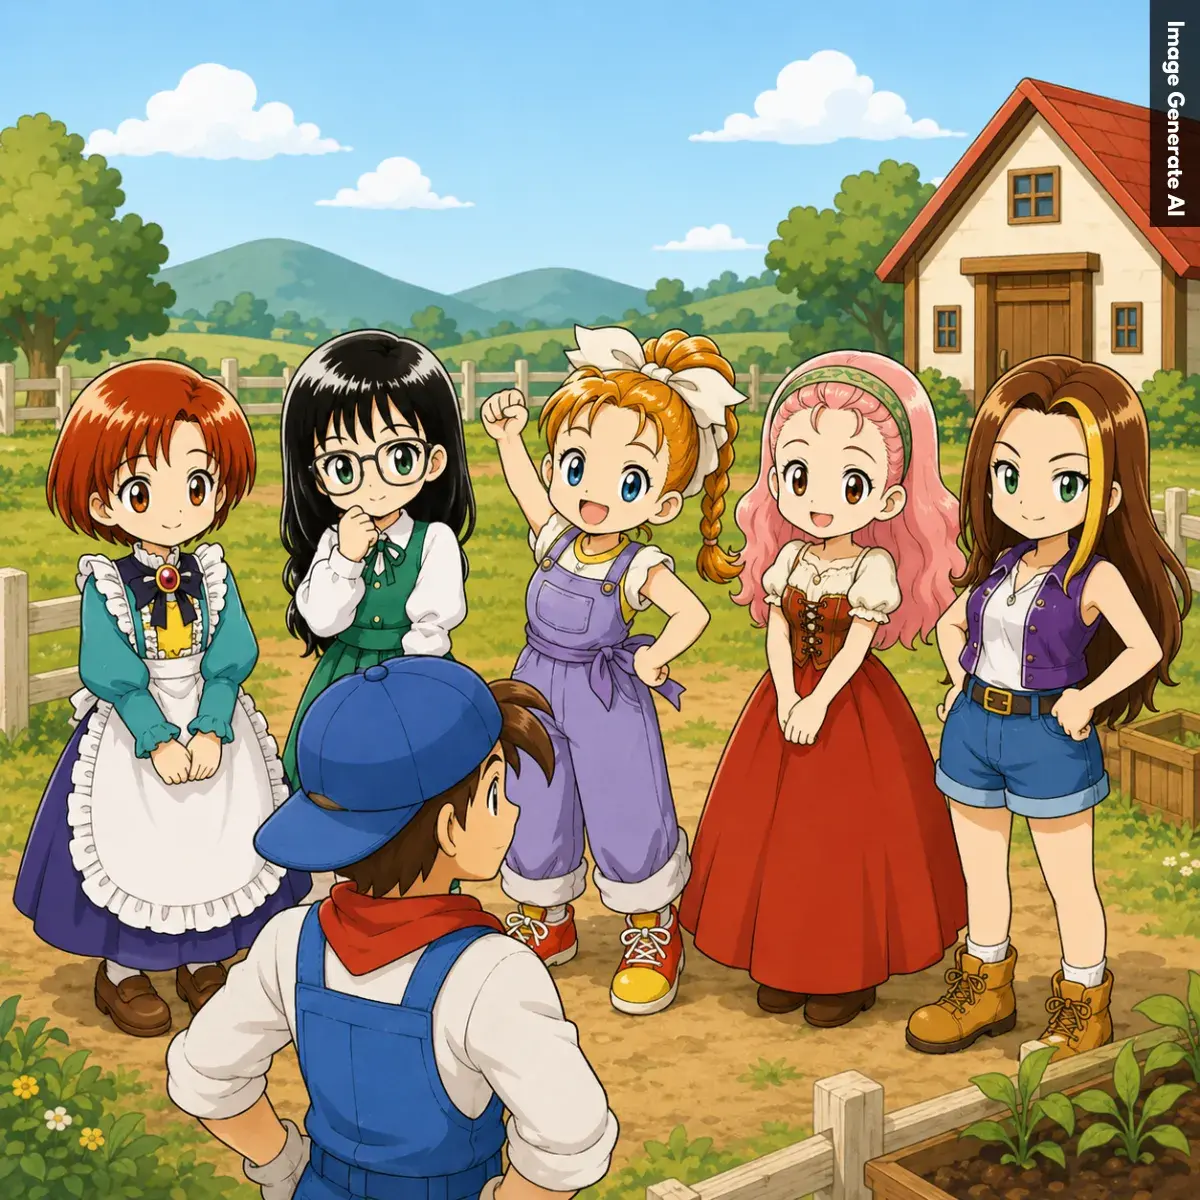
Getting married is one of the biggest milestones in Harvest Moon: Back to Nature, but it’s not something you should rush.
Many first-time players spend all of Year 1 trying to raise a bachelorette’s affection as quickly as possible, only to realize later that they haven’t upgraded their house or met the other marriage requirements.
A much better approach is to let your relationship progress naturally while you’re building a successful farm.
By the time your finances are stable and your house has been upgraded, you’ll usually be much closer to marriage than you expect.
After all, Harvest Moon: Back to Nature rewards consistency far more than speed.
Mineral Town offers five marriage candidates:
Each has her own personality, daily schedule, favorite gifts, and heart events.
While many guides rank them by difficulty or gift availability, none is objectively “better” than the others. Every candidate follows the same basic progression system, and each has a unique storyline that makes the relationship feel different.
Instead of choosing based on efficiency, pick the character whose personality you genuinely enjoy.
Since you’ll be interacting with her almost every day, your personal preference matters much more than a slightly easier gift list.
Once you’ve decided, try to speak with her whenever your daily route naturally passes by her location.
This steady approach builds affection without forcing you to redesign your entire schedule.
Friendship and affection increase through small, consistent actions.
Talking every day, giving appropriate gifts, and attending festivals together gradually raise a character’s Heart Color from Black to Purple, Blue, Green, Yellow, Orange, and finally Red.
Many players assume that expensive gifts lead to dramatically faster progress.
In reality, consistency is far more important.
A favorite gift given every day usually works much better than an expensive present delivered only occasionally.
Fortunately, several marriage candidates appreciate items that are easy to obtain during normal gameplay.
Flowers, eggs, milk, Bamboo Shoots, and other forage items can often be collected while following your usual daily routine.
This means building a relationship rarely requires going out of your way.
If you’re already visiting town to buy supplies, upgrade tools, or talk with villagers, spending another minute delivering a gift quickly becomes part of your normal day.
Increasing affection alone isn’t enough.
Each marriage candidate has several Heart Events that reveal more about her personality while also serving as important progression milestones.
These events only occur under specific conditions, usually involving certain heart colors, locations, weather, seasons, or times of day.
Because of this, don’t be surprised if nothing happens immediately after reaching a new heart level.
Simply continue playing normally and keep visiting the areas where your chosen candidate frequently spends time.
Eventually, the required conditions will naturally align.
Many players accidentally delay marriage because they focus only on giving gifts while forgetting that Heart Events are equally important.
If an event becomes available, prioritize watching it.
Not only do these scenes move the relationship forward, but they also contain some of the most memorable character moments in the game.
Eventually, your chosen bachelorette will reach a Red Heart.
However, that’s only one part of the process.
Before proposing, make sure you’ve completed the remaining requirements:
Once every condition has been fulfilled, simply present the Blue Feather to your future spouse.
After the wedding, married life becomes another enjoyable part of your daily routine rather than the end of the game.
In fact, many players reach marriage around the middle or latter half of Year 2, which leaves plenty of time to continue expanding the farm before the Mayor’s evaluation arrives.
By the time Year 3 begins, your priorities are very different from those during your first Spring.
Money should no longer be your biggest concern.
Instead, this final year is about refining everything you’ve already built.
Your farm should operate smoothly, your tools should be highly upgraded, your relationships should be well established, and your daily routine should feel almost effortless.
Rather than introducing completely new objectives, Year 3 rewards players who have steadily developed every aspect of their farm throughout the previous two years.
Think of it as the final stretch before the Mayor decides whether you’re truly ready to inherit your grandfather’s legacy.
By Year 3, your farm should already be generating income from several different sources.
Instead of worrying about earning enough money to survive, your focus now shifts toward maintaining everything you’ve built over the past two years.
Continue planting profitable seasonal crops, care for your livestock every day, and keep your tools in top condition. At this stage, routine is your greatest advantage. Since you’ve already established efficient habits, most daily chores should only take a small portion of the day, leaving plenty of time for fishing, mining, festivals, and social activities.
If you’re still working toward marriage, Year 3 provides more than enough time to complete the remaining Heart Events and proposal requirements. Otherwise, simply continue strengthening your relationships with villagers, as friendship plays an important role in the final evaluation.
This final year isn’t about making dramatic changes.
It’s about demonstrating that your farm has become a stable, successful part of Mineral Town.
At the end of the third year, Mayor Thomas visits your farm to determine whether you’ve fulfilled your grandfather’s wish.
Although many new players worry about this event, the evaluation is much less intimidating than it first appears.
The Mayor doesn’t expect perfection.
Instead, he looks at the overall development of your farm and your contribution to the community.
Several factors influence the final result, including:
If you’ve consistently followed the strategies in this walkthrough, there’s very little reason to worry.
A profitable farm, healthy animals, upgraded tools, and positive relationships are usually more than enough to pass the evaluation comfortably.
After receiving the Mayor’s approval, the game doesn’t suddenly end.
Instead, you’re allowed to continue playing for as long as you like, giving you the freedom to complete unfinished goals, collect every recipe, upgrade every tool, or simply enjoy life in Mineral Town without any remaining time limit.
Although this walkthrough follows the game chronologically, a few core principles remain valuable from your very first day until well beyond Year 3.
Keeping these habits in mind makes progression smoother regardless of the season.
Checking the weather forecast every morning only takes a few seconds, but it can completely change how you plan your day.
Rainy weather means you can skip watering crops and dedicate that extra time to mining, fishing, or clearing more land. It also helps you schedule Watering Can upgrades without risking your harvest.
Many experienced players treat the television as the first “tool” they use every morning.
Higher-level tools don’t simply save stamina.
They save time.
As your farm expands, reducing repetitive work becomes far more valuable than increasing raw stamina alone.
Continue collecting ore whenever possible and upgrade your equipment gradually instead of waiting until the late game.
Every improvement makes the next season easier than the last.
If there’s one investment that consistently pays off throughout the entire game, it’s building friendship with the Harvest Sprites.
Giving them Flour during your first Spring may seem insignificant at the time, but the hours they save once they begin helping around your farm are invaluable.
Rather than treating them as optional helpers, consider them permanent members of your farming team.
One of the biggest strengths of Harvest Moon: Back to Nature is that it never forces you to focus on only one activity.
Some days are perfect for planting crops.
Others are better spent mining, fishing, attending festivals, collecting Power Berries, or simply talking with villagers.
Learning to balance these activities is far more rewarding than trying to optimize every single day for maximum profit.
Ironically, players who slow down and enjoy the game’s rhythm often build the most successful farms in the long run.
Following a checklist makes it much easier to stay on track without missing important milestones. Use this complete Harvest Moon Back to Nature walkthrough checklist as a quick reference while progressing through each season and year.
| Progress | Main Goals |
|---|---|
| First Week | Plant Turnips, obtain the Fishing Rod, buy your first Chicken, meet the villagers, begin giving Flour to the Harvest Sprites. |
| Spring | Build a stable routine, upgrade your first tools, mine regularly, expand friendships, and prepare for Summer. |
| Summer | Invest in Pineapples, expand livestock, hire the Harvest Sprites, and continue improving your equipment. |
| Fall | Focus on Sweet Potatoes, upgrade your house, increase savings, and prepare for Winter. |
| Winter | Explore the Winter Mine, collect rare ores, improve your tools, strengthen relationships, and gather Power Berries. |
| Year 2 | Expand your farm, prepare for marriage, upgrade your home, and maximize efficiency. |
| Year 3 | Maintain a successful farm, complete remaining goals, and pass the Mayor’s final evaluation. |
One reason Harvest Moon: Back to Nature has remained beloved for decades is that it never pressures you to play a certain way.
You can chase maximum profits, collect every item, build the perfect ranch, or simply enjoy a slower life in Mineral Town. As long as you continue making steady progress, the game rewards patience, consistency, and thoughtful planning far more than rushing toward the finish line.
Hopefully, this Harvest Moon: Back to Nature walkthrough has given you a clear roadmap from your very first Spring to the Mayor’s final evaluation. Whether your goal is to optimize every season or simply experience the charm of Mineral Town again, the strategies in this guide should help you build a thriving farm while still enjoying everything the game has to offer.
Good luck, and enjoy your new life on the farm!
Read Also:
If you still have questions after following this Harvest Moon: Back to Nature walkthrough, you’re not alone. Below are answers to some of the most common questions players have about progression, farming, tool upgrades, marriage, and completing the game.
Whether you’re just starting your first Spring or preparing for the Mayor’s final evaluation, these Frequently Asked Questions about Harvest Moon: Back to Nature should help clarify the mechanics and guide you toward a smoother farming experience.
Technically, yes—but it isn’t the way most players experience the game.
Some experienced players have created highly optimized one-year challenge runs that prioritize mining, livestock management, and aggressive profit strategies. These routes often require careful planning, precise daily schedules, and extensive knowledge of hidden mechanics.
For most players, however, there’s no reason to rush.
The game is designed around a three-year evaluation period, giving you plenty of time to expand your farm, get married, upgrade your tools, and enjoy life in Mineral Town at your own pace.
Unless you’re attempting a personal challenge, focusing on steady progress usually leads to a far more enjoyable experience.
If your goal is maximizing profit, these crops offer the best overall value during Year 1.
| Season | Best Crop | Why It Works |
|---|---|---|
| Spring | Turnip | Fast growth and quick cash flow. |
| Summer | Pineapple | Extremely profitable with multiple harvests. |
| Fall | Sweet Potato | The highest long-term income in the game. |
| Winter | None | Focus on mining instead of farming. |
While other crops certainly have their uses, these choices provide the strongest balance between investment and profit for most players.
Although every tool eventually becomes important, some upgrades provide much greater value during the early game.
A good priority looks like this:
The Watering Can should almost always come first because watering crops is your most repetitive daily task.
Just remember to upgrade it before a rainy day whenever possible.
The answer is both.
Many beginners think they need to choose one activity, but Harvest Moon: Back to Nature rewards players who balance multiple sources of income.
During Spring and Summer, farming should remain your primary focus while mining supports tool upgrades and provides additional income.
During Winter, that balance naturally shifts. Since outdoor crops are unavailable, mining becomes one of the most productive activities you can do each day.
Rather than replacing farming, mining complements it throughout the entire game.
No.
Marriage is one of the game’s biggest milestones, but it isn’t required to pass the Mayor’s final evaluation.
That said, many players choose to get married because it unlocks additional events and makes the farm feel more complete.
If you’re already upgrading your house and building friendships, reaching marriage naturally becomes one of the most rewarding goals during Year 2.
Yes.
Passing the Mayor’s evaluation doesn’t end your adventure.
Instead, you’re allowed to continue playing indefinitely.
This gives you unlimited time to complete unfinished goals, collect every recipe, fully upgrade your tools, raise more animals, or simply continue enjoying life in Mineral Town without worrying about another deadline.
For many players, the real fun actually begins after the evaluation, when the pressure is gone and the farm they’ve spent years building can finally be enjoyed at its fullest.
During your first Spring, focus on growing Turnips, foraging around Mother’s Hill, mining for ores, and buying your first Chicken as soon as possible.
These activities create multiple sources of income without requiring large investments. Instead of relying on crops alone, combining farming, mining, fishing, and foraging helps you earn money much more consistently throughout the early game.
The best way to increase your maximum stamina is by collecting Power Berries.
Each Power Berry permanently expands your stamina bar, allowing you to work longer before becoming exhausted. Some are hidden in mines, while others are obtained through fishing or special events.
Finding them early makes farming, mining, and logging noticeably easier for the rest of the game.
Absolutely.
The Harvest Sprites are among the most valuable helpers in the game. Once you’ve built enough friendship with them, they can water crops, harvest fields, and care for animals on your behalf.
Giving them Flour regularly during your first Spring is one of the smartest long-term investments you can make because it saves countless hours of farm work later.
Your first year should focus on building a strong foundation rather than chasing perfection.
Prioritize fast-growing crops, upgrade your tools gradually, purchase your first Chicken, establish a daily mining routine, build friendships with villagers, and start befriending the Harvest Sprites.
By the end of Year 1, your goal is to have a profitable, well-organized farm that makes Year 2 much easier and prepares you for marriage and the Mayor’s final evaluation.
Harvest Moon: Back to Nature is more than just growing crops and raising animals. The game rewards patience, consistency, and the small decisions you make every day. A good Harvest Moon: Back to Nature walkthrough helps you build a strong foundation without taking away the fun of discovering the game yourself.
There isn’t a single right way to play. Whether you focus on farming, mining, or building relationships, the best experience comes from enjoying the journey at your own pace.
How do you usually spend your first Spring in Mineral Town? Share your favorite strategy or tip in the comments—we’d love to hear your experience.