Physical Address
304 North Cardinal St.
Dorchester Center, MA 02124
Physical Address
304 North Cardinal St.
Dorchester Center, MA 02124
Your Guide to the Latest in Tech
Your Guide to the Latest in Tech

ruminesia – Trying to capture a clean screen recording on your iPhone can feel harder than it should—especially when you want it to look sharp and professional. Whether you’re creating a tutorial, sharing gameplay, or documenting a workflow, knowing the right tips for recording high-quality screen on iPhone 15 can make a noticeable difference in the final result.
Many users hit the record button without adjusting a few simple settings, only to end up with dim footage, cluttered notifications popping in, or audio that sounds like it was recorded in a hallway. It’s a common frustration, and completely avoidable with a bit of prep.
With the iPhone 15 hardware and iOS tools, you already have everything you need—you just have to use it the right way. A few small tweaks to how you record can instantly improve clarity, sound quality, and overall presentation.
Key Highlights:
- Recording in landscape mode makes your screen captures easier to watch on most devices.
- Adjusting quality settings helps preserve detail and text clarity.
- Using an external microphone significantly improves voice narration.
- Ensuring enough storage prevents interruptions and failed recordings.
- Activating Do Not Disturb keeps your screen free from pop-ups and distractions.
- Trimming your clips after recording creates a smoother, more polished final result.
Producing high-quality screen recordings on the iPhone 15 requires attention to visual clarity, audio quality, and device readiness. The following tips help you prepare your device and refine your content so every recording looks clean, stable, and professional.
Recording in landscape mode gives you a wider field of view, making your content look more natural and easier to follow—especially for tutorials, gaming walkthroughs, or app demonstrations. Landscape format also fits better on most screens, reducing black bars and improving overall visual appeal.
Before recording, open Settings > Screen Recording and select the highest available quality for your device. Higher quality settings help preserve small interface details, text readability, and color accuracy. This is especially important when documenting step-by-step processes that rely on clarity.
If your recording includes verbal instructions, using an external microphone can significantly enhance audio clarity. Built-in microphones tend to capture background noise or inconsistent volume levels. An external mic helps deliver sharper, more focused narration so viewers can follow along without strain.
High-resolution screen recordings consume more storage than regular videos. Before starting, check your available storage and remove unused apps, files, or media if needed. Adequate space ensures the recording runs smoothly and prevents sudden stops caused by low storage.
Recording can quickly drain your battery, especially at higher resolutions. Start with a fully charged phone or keep it connected to a power source to avoid interruptions. A stable power supply ensures consistent performance throughout the recording session.
Enabling Do Not Disturb prevents notifications, calls, or alerts from appearing on-screen while recording. This helps maintain a clean, uninterrupted video and avoids sensitive information accidentally appearing in your footage.
Once your recording is complete, open it in the Photos app to trim unnecessary sections, adjust the start and end, or remove mistakes. Quick edits help keep the final video concise, engaging, and easier for viewers to follow.
Read More:
Here is the full FAQ section answering the most common questions about screen recording on iPhone 15.
If the button doesn’t appear, the feature likely hasn’t been enabled. Here’s how to add it:
To record your voice, you need to enable the microphone manually. Here’s how:
A silent recording is usually caused by one of the following:
No, the iPhone 15 does not allow recording audio from calls or FaceTime. Apple restricts this for privacy and legal reasons, so the system automatically mutes audio when recording during a call.
All screen recordings are automatically saved in the Photos app. You’ll find them in:
Streaming apps use DRM protection, which blocks captured visuals. That’s why recording content from apps like Netflix or Disney+ results in a black screen.
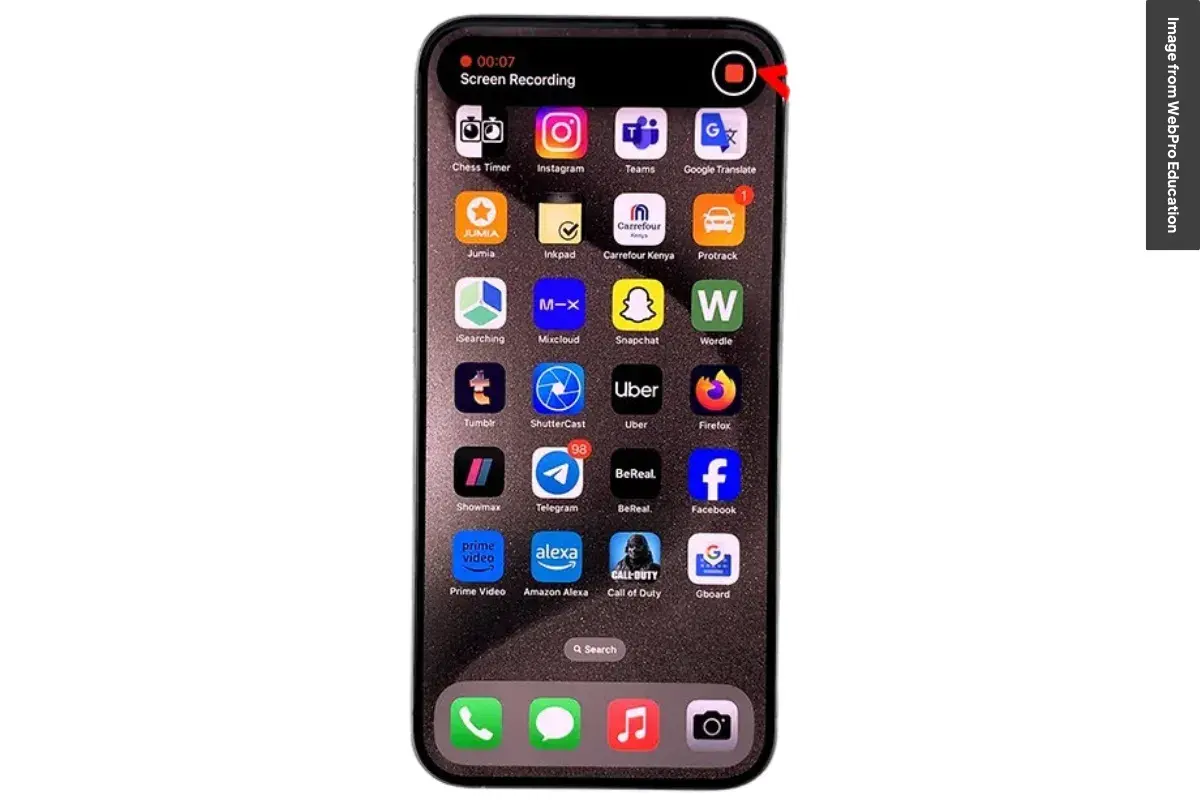
You can stop recording in two ways:
There’s no system-imposed time limit. You can record as long as your storage and device temperature remain safe. If the phone overheats or storage runs out, the recording may stop automatically.
Yes, any notifications that appear while recording will be captured. Turn on Do Not Disturb or Focus Mode if you want a clean, distraction-free recording.
Yes, you can perform basic edits directly in the Photos app. You can:
For advanced editing, you can export the video to a third-party editing app.
Using the right tips for recording high-quality screen on iPhone 15 can make your screen captures clearer, cleaner, and far more useful—whether you’re creating content or simply sharing instructions with someone. Small adjustments in settings, audio setup, and preparation go a long way.
The key is consistency: a quick check before recording helps you avoid interruptions, distracting noise, or unclear visuals. Once you get used to these habits, producing polished screen recordings becomes much easier and more reliable.
Feel free to try these steps in your next recording session and see how much they improve your results. And if you’ve found other tricks that work well for you, don’t hesitate to share your experience or leave a comment.