Ruminesia – Whether you’ve just bought a new iPhone or have been using one for years, there’s always a feature or setting you haven’t explored yet. That’s why a collection of iPhone tutorials and tips can help get more out of your device.
Interestingly, many useful iPhone features are easy to miss because they work quietly in the background. A few simple settings or shortcuts can often make everyday tasks faster, easier, and more convenient.
From setting up a new iPhone to managing alerts, messages, and camera features, these practical tips can help you use your device with more confidence and less guesswork.
Key Highlights
Preparing your Apple ID and Wi-Fi beforehand makes iPhone setup much smoother.
Built-in features like Send Later help manage communication more efficiently.
Reviewing privacy and notification settings improves both security and daily usability.
AMBER Alerts can be customized without completely disabling important notifications.
Night Mode delivers better low-light photos when your iPhone remains steady.
Screen recording is a simple way to capture tutorials, gameplay, and troubleshooting steps.
Whether you’re setting up a brand-new device or exploring features you’ve never used before, iPhones come with plenty of tools that can make everyday tasks easier. The challenge is knowing where to find them and how to use them effectively.
This collection of iPhone tutorials and tips is designed to help you get the most out of your device, from the moment you turn it on for the first time to managing notifications, camera features, messaging tools, and more. Each guide focuses on practical steps that are easy to follow, even if you’re new to the Apple ecosystem.
Interestingly, many iPhone features are designed to work automatically in the background, which is convenient but can also make them easy to overlook. Learning how these tools work gives you more control over your device and often helps you discover features that improve both productivity and everyday convenience.
1. How to Start Your iPhone for the First Time
Before learning how to start your iPhone for the first time, spend a few minutes preparing your device and account details. This helps ensure a smooth setup experience from the start.
Preparation Before Turning On Your iPhone
Charge your iPhone – Plug it in and charge it for 15–30 minutes to avoid interruptions during setup.
Check the box contents – Make sure you have the iPhone, charging cable, and a compatible power adapter if needed.
Prepare your Apple ID – Have your Apple ID email and password ready, or create an account during setup.
Steps to Power On Your iPhone
Turning on your iPhone only takes a few seconds.
Press and hold the Power button – Keep holding it until the Apple logo appears.
Wait for the Hello screen – Once the “Hello” screen appears, your iPhone is ready for setup.
Setting Up Your iPhone for the First Time
Follow the on-screen instructions to complete the setup process.
Choose your language and region – This determines your keyboard, date format, and regional settings.
Connect to Wi-Fi – Use a stable network to activate your iPhone and download updates if needed.
Sign in with your Apple ID – This gives you access to iCloud, the App Store, and other Apple services.
Set up Face ID or Touch ID – Add biometric security now or configure it later in Settings.
Create a passcode – Choose a secure passcode to protect your device and personal data.
Once finished, you’ll be taken to the Home Screen and can start using your iPhone right away.
2. How Do I Activate My New iPhone by Myself
Setting up a new iPhone is usually quick, especially when you prepare a few things beforehand. If you’re wondering how do I activate my new iPhone by myself, these practical steps will help you get everything running smoothly from the start.
Prepare Your Apple ID and SIM Information: Before turning on your iPhone, make sure you know your Apple ID and password. If you’re using a physical SIM or eSIM, keep any activation details nearby to avoid delays during setup.
Update iOS When Available: If your iPhone prompts you to install an update during setup, it’s worth doing right away. The latest iOS version often includes important security improvements, bug fixes, and better compatibility with apps and services.
Connect to a Stable Wi-Fi Network: Use a reliable Wi-Fi connection during activation. A weak connection can slow down the process or cause verification issues, especially when signing in to your Apple ID.
Follow the On-Screen Activation Steps: Select your language, region, and cellular settings as prompted. This sounds simple, but taking a moment to review each option helps ensure your device is configured correctly from the beginning.
Choose the Right Data Transfer Method: If you’re upgrading from another iPhone, Quick Start is usually the fastest option. If you’d rather start fresh, manual setup gives you more control over which apps, files, and settings you keep.
Set Up Face ID or Touch ID Early: Register your face or fingerprint during setup to make unlocking your iPhone faster and more secure. Besides that, it also simplifies app logins and Apple Pay purchases.
Adjust Privacy and Notification Settings: Take a few minutes to review app permissions and notification preferences. What many users forget is that these settings can significantly improve both privacy and day-to-day usability.
Customize Display Settings to Your Preference: Choose between Light Mode and Dark Mode based on your comfort level. In practice, Dark Mode is often easier on the eyes during nighttime use, while Light Mode works well in brighter environments.
3. How to Schedule a Text on iPhone
Learning how to schedule a Text on iPhone is a simple way to send messages at the right time without setting reminders for yourself. With Apple’s Send Later feature, you can prepare texts in advance and let your iPhone handle the delivery.
Open the Messages App: Open Messages and select an existing conversation or start a new one. Make sure you’ve chosen the correct recipient before continuing.
Type Your Message: Write your message as usual. Take a quick look to check for any mistakes before scheduling it.
Tap Send Later: Tap the + icon next to the text box and select Send Later. This opens the scheduling options.
Choose a Delivery Time: Select the date and time you want the message to be sent. Double-check the schedule to avoid timing mistakes.
Confirm the Schedule: Tap Send to save the scheduled message. Your iPhone will automatically send it at the selected time.
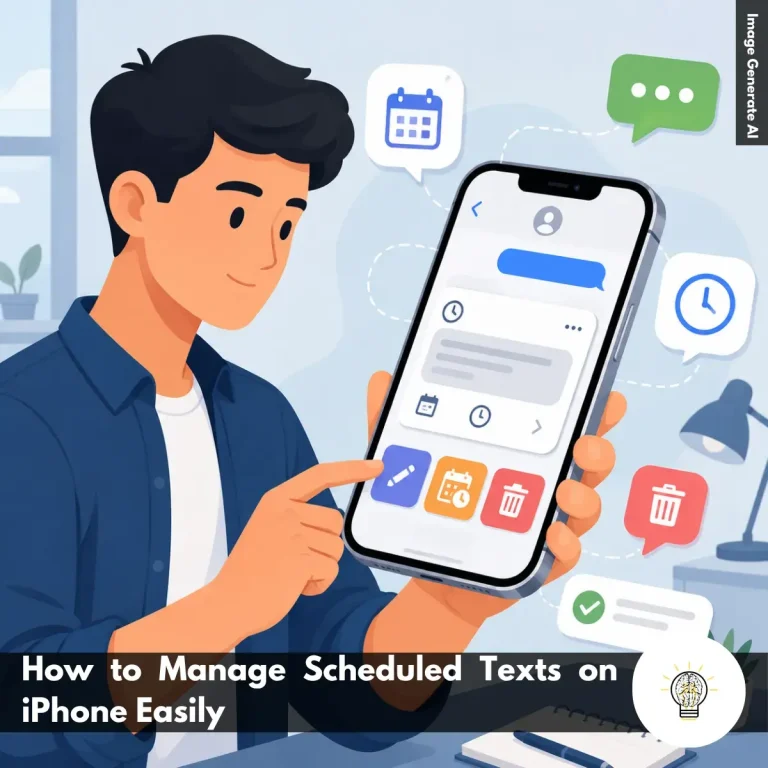
4. How to Manage Scheduled Texts on iPhone
Managing scheduled texts on an iPhone is easy once you know where to find your scheduled messages. Whether you need to make changes, adjust the timing, or cancel a text, Apple gives you full control before it’s sent.
Edit a Scheduled Message: Need to update a detail? Open the conversation, edit the scheduled text, and save your changes. This is useful for correcting times, locations, or other information.
Reschedule the Delivery Time: If the timing no longer works, change the scheduled date or time. This helps ensure your message arrives when it’s most relevant.
Delete an Unneeded Message: If you no longer want to send the text, simply delete it before the scheduled delivery time. Once removed, it won’t be sent.
Review Scheduled Messages: Check your pending messages regularly to make sure the content, recipient, and delivery time are still correct.
Send the Message Sooner: If something becomes urgent, adjust the delivery time or send the message immediately if the option is available.
Verify Delivery Status: After the scheduled time passes, confirm the message was sent successfully by checking its delivery status.
5. How to Turn Off Amber Alerts on iPhone
If you’re wondering how to turn off Amber Alerts on iPhone, the process is simple and only takes a minute. You can disable these notifications directly from the Settings app if you prefer not to receive Amber Alert messages on your device.
Open the Settings App: Launch the Settings app from your Home Screen or App Library. This is where you manage system features, including emergency alert settings.
Tap Notifications: Scroll down and select Notifications. This section contains settings for both app notifications and government-issued alerts.
Find Government Alerts: Scroll to the bottom of the page until you see Government Alerts. Here, you’ll find options for Amber Alerts, Emergency Alerts, and other public safety notifications.
Turn Off Amber Alerts: Locate Amber Alerts and switch the toggle off. Once it turns gray, your iPhone will stop receiving Amber Alert notifications.
Before disabling Amber Alerts, remember that these notifications are designed to help share urgent information about missing or abducted children. While turning them off is a personal choice, many users keep them enabled because they can support public safety efforts during critical situations.
Notes:
These steps work on most iPhone models running iOS 16 and later, although the menu layout may vary slightly depending on your iOS version.
6. How to Turn on AMBER Alerts on iPhone
If you’re wondering how to turn on AMBER Alerts on iPhone, the process is quick and only takes a few taps. While AMBER Alerts are enabled by default in many regions, it’s worth checking your settings to make sure you can still receive these important child abduction notifications when they are issued in your area.
Open the Settings App: Start by opening the Settings app on your iPhone. If you can’t find it on your Home Screen, swipe down and use Spotlight Search to locate it quickly. This is where you’ll access all notification and alert settings.
Navigate to Notifications: Scroll down and tap Notifications. This section controls how alerts appear on your device, including app notifications, emergency alerts, and government-issued warnings.
Find the Government Alerts Section: Scroll to the bottom of the Notifications page until you see Government Alerts. Depending on your country or carrier, you may see options such as AMBER Alerts, Emergency Alerts, or Public Safety Alerts.
Turn On AMBER Alerts: Locate the AMBER Alerts toggle and make sure it’s switched on. When the toggle is green, your iPhone can receive AMBER Alert notifications automatically whenever authorities issue them in your area.
Confirm the Setting Is Enabled: Before leaving the page, take a quick look to ensure the AMBER Alerts switch remains turned on. This sounds simple, but many users accidentally disable important alerts while adjusting other notification settings.
7. How to Manage Amber Alert Notifications on iPhone
Managing AMBER Alerts on iPhone doesn’t always mean turning them off completely. If the notifications feel too disruptive, there are several settings you can adjust to make them less intrusive while still receiving important information when needed.
Turn Off the Alert Sound: If the loud emergency tone bothers you, go to Settings > Notifications > Government Alerts and disable Always Play Sound. You’ll still receive the alert on your screen, but without the sudden noise that can interrupt meetings, classes, or sleep.
Enable Priority Delivery: Turn on Always Deliver to make sure AMBER Alerts remain visible even when your iPhone is in silent mode. This is a good option if you prefer seeing important notifications instead of hearing them.
Use Location-Based Alerts: Enable Local Location Awareness so your iPhone can deliver alerts that are more relevant to where you are. This can help reduce notifications about incidents happening far outside your area.
Set Up a Focus Mode: Open Settings > Focus and choose a mode such as Sleep or Work. This helps limit everyday distractions while allowing important alerts to reach you when necessary.
Keep Lock Screen Alerts Silent: If your iPhone supports it, look for the When Phone is Locked setting under Government Alerts and choose Silent. This lets you see alerts later without being startled by a loud notification during the night.
8. How to Turn On Night Mode on iPhone Camera
Learning how to Turn On Night Mode on the iPhone Camera is easier than many people expect. While the feature usually activates automatically, knowing how to control it manually can help you get better results in challenging low-light situations.
Open the Camera in Photo Mode: Start by launching the Camera app and selecting Photo mode. Night Mode is designed for standard photo shooting, so it may not appear in certain other camera modes.
Check if Night Mode Is Available: Point your iPhone toward a dimly lit scene and look for the moon icon near the camera controls. A white icon means Night Mode is available, while a yellow icon means it’s already active.
Turn On Night Mode Manually: If the feature doesn’t activate automatically, tap the moon icon to enable it yourself. Once the icon turns yellow, your iPhone is ready to capture the scene using Night Mode.
Adjust the Exposure Time: Tap the arrow above the viewfinder, select the moon icon, and use the slider to change the exposure length. Try increasing the exposure for darker scenes where you want more brightness and detail.
Keep Your iPhone Steady While Shooting: Make sure you hold the phone as still as possible during the capture process. If possible, rest it on a stable surface or use a tripod for the sharpest results.
9. How to Screen Record on iPhone 15
Screen recording is one of the easiest ways to capture tutorials, gameplay, app walkthroughs, or troubleshooting steps on your iPhone. If you’re looking for how to screen record on iPhone 15, follow these simple steps to get started quickly.
Add Screen Recording to Control Center: Before you can record your screen, make sure the Screen Recording shortcut is available in Control Center. Go to Settings > Control Center, then tap the green + icon next to Screen Recording if it isn’t already added.
Start Recording Your Screen: Once everything is set up, open Control Center by swiping down from the top-right corner of the screen. Tap the Screen Recording icon and wait for the 3-second countdown before recording begins, giving you time to navigate to the screen you want to capture.
Record with Microphone Audio if Needed: If you want to add narration or capture your voice, press and hold the Screen Recording icon before starting. Turn on the Microphone option, then begin recording to include audio alongside your screen activity.
Stop and Save Your Recording: When you’re finished, tap the red status indicator or the Dynamic Island at the top of the screen and select Stop. Your video will automatically be saved to the Photos app, where you can edit, trim, or share it right away.
Check App Restrictions Before Recording: Some streaming, banking, or privacy-focused apps may block screen recording to protect content and user data. If a recording appears blank or stops automatically, the app likely has recording restrictions enabled.
If you’re looking for quick answers about iPhone features, settings, and troubleshooting, this FAQ covers the questions users ask most often. These Frequently Asked Questions About iPhone provide practical solutions that are easy to follow.
1. How do I force restart an iPhone that is frozen?
If your iPhone is frozen and not responding, you can force restart it using the hardware buttons. Press and quickly release the Volume Up button, then press and quickly release the Volume Down button. After that, press and hold the Side button until the Apple logo appears.
This process does not delete your data. It simply forces the device to restart and is often the fastest way to resolve temporary software issues.
2. Why is my iPhone battery draining so fast suddenly?
Sudden battery drain is usually caused by background app activity, recent iOS updates, high screen brightness, or location services running continuously. In some cases, your iPhone may also be indexing data after a software update. To identify the cause:
Go to Settings > Battery
Check which apps use the most power
Reduce screen brightness
Disable unnecessary Background App Refresh
Turn on Low Power Mode when needed
3. How do I clear the storage space on my iPhone?
The quickest way to free up storage is to review what’s using the most space. You can find this information in Settings > General > iPhone Storage. Useful ways to clear storage include:
Delete unused apps
Offload apps you rarely use
Remove large videos and downloads
Delete old messages and attachments
Move photos to iCloud or another backup service
4. What is the difference between an iPhone Pro and a standard model?
The main difference is that iPhone Pro models offer more advanced features. They typically include better cameras, higher-performance chips, premium materials, and ProMotion displays with smoother scrolling.
Standard iPhone models focus on everyday performance and affordability. For most users, they provide excellent performance, while Pro models are designed for photography enthusiasts, gamers, and content creators.
5. How can I back up my iPhone securely?
The easiest way is to use iCloud Backup. Once enabled, your iPhone automatically backs up important data when connected to Wi-Fi, charging, and locked. You can also create a local encrypted backup:
Connect your iPhone to a Mac or PC
Open Finder or Apple Devices
Select your device
Choose Encrypt Local Backup
Start the backup process
6. How do I transfer data from an old iPhone to a new one?
Apple’s Quick Start feature makes transferring data simple. Place your new iPhone near your old one and follow the on-screen instructions. Basic steps:
Turn on the new iPhone
Keep both devices close together
Scan the setup animation with the old iPhone
Select Transfer from iPhone
Wait for the transfer to complete
The process moves apps, photos, settings, and most personal data automatically.
7. Is it safe to leave my iPhone charging overnight?
Yes, modern iPhones are designed to handle overnight charging safely. Once the battery reaches full charge, the charging system automatically manages power delivery.
One thing many users overlook is the Optimized Battery Charging feature. When enabled, it learns your charging habits and helps reduce long-term battery wear.
8. How do I block spam calls on my iPhone?
You can reduce unwanted calls using the built-in Silence Unknown Callers feature. This automatically sends calls from unknown numbers to voicemail. To enable it:
Open Settings
Tap Phone
Select Silence Unknown Callers
Turn the feature on
For additional protection, consider using a trusted caller ID and spam-filtering app.
9. What should I do if my iPhone gets wet?
If your iPhone gets wet, act quickly to minimize potential damage. Turn the device off immediately and gently dry the exterior with a soft cloth. Follow these steps:
Power off the iPhone
Remove any accessories
Let it air dry in a well-ventilated area
Wait at least 24 hours before charging
Avoid hair dryers or direct heat
Do not place the device in rice, as small particles can enter the ports and cause additional problems.
10. How do I turn off location tracking on my iPhone?
You can disable location tracking through the Privacy settings. This gives you more control over how apps access your location data. To turn it off:
Open Settings
Tap Privacy & Security
Select Location Services
Turn off Location Services completely
Alternatively, you can manage location access individually for each app, which is often the most practical option for balancing privacy and convenience.
Conclusion
An iPhone is designed to be easy to use, but many of its most useful features aren’t always obvious at first glance. Sometimes, a small setting change or a feature you never knew existed can make everyday tasks feel much simpler. That’s what makes a collection of iPhone tutorials and tips valuable—not because it teaches complicated tricks, but because it helps you get more from a device you already use every day.
Interestingly, the best iPhone experience often comes from understanding the little things. Whether it’s managing notifications more effectively, taking better photos in low light, or automating routine tasks, these small improvements can add up over time and make your device feel more personal and useful.
Technology works best when it quietly supports your daily life instead of getting in the way. As you continue exploring your iPhone, you may discover features that fit your habits better than you expected. Have you found an iPhone tip or hidden feature that changed how you use your device?
A technology writer with 5 years of professional experience as a WordPress Developer and SEO Specialist. Focused on covering apps, gadgets, and the latest digital trends, while creating SEO-friendly content that helps readers stay informed and businesses grow their online presence.